Where can I download the Smarwo mobile APP?
A: Search "Smarwo" in the APP Store for Iphone and Google Play for Android to download. Or in the Smarwo website https://www.smarwo.com/, you can also scan the QR code under the“About Us”menu to download the Smarwo app.
2.How to register Smarwo account?
A: Open Smarwo APP and create an account with your email address. Password can be 6-16 digitals, letters or mixed. When registering, you need to enter the valid verification code from Smarwo.
How to add a device ?
A: Login Smarwo; click the "+" on the upper right corner of the home page; select the correct device type, and then follow the prompt to configure .
How to switch the device's to other WIFI network ?
A: Click on “Device Settings”, choose”Reset Wi-Fi”in the“Device Settings”and then select the WIFI you want to connect.
Why it says “device offline” when adding the device?
A: Please make sure that camera is power on and the network is connected.
What should I do if the indicator is always off when adding a device?
A: Camera takes a few seconds to initiate after power on. If the indicator is always off, please check the power source or try another power adapter.
Instructions for Easy Operation of Cube Camera — A3S1, A3S2
1. Download and install APP
1). Scan the QR codes shown below or search for “Smarwo” in APP Store or Google Play to download and install it;
2. Add Camera in the Smarwo
1). Connect your mobile phone to 2.4G WIFI network.(support 2.4G only);
2). Start the “Smarwo” APP, register and log in;
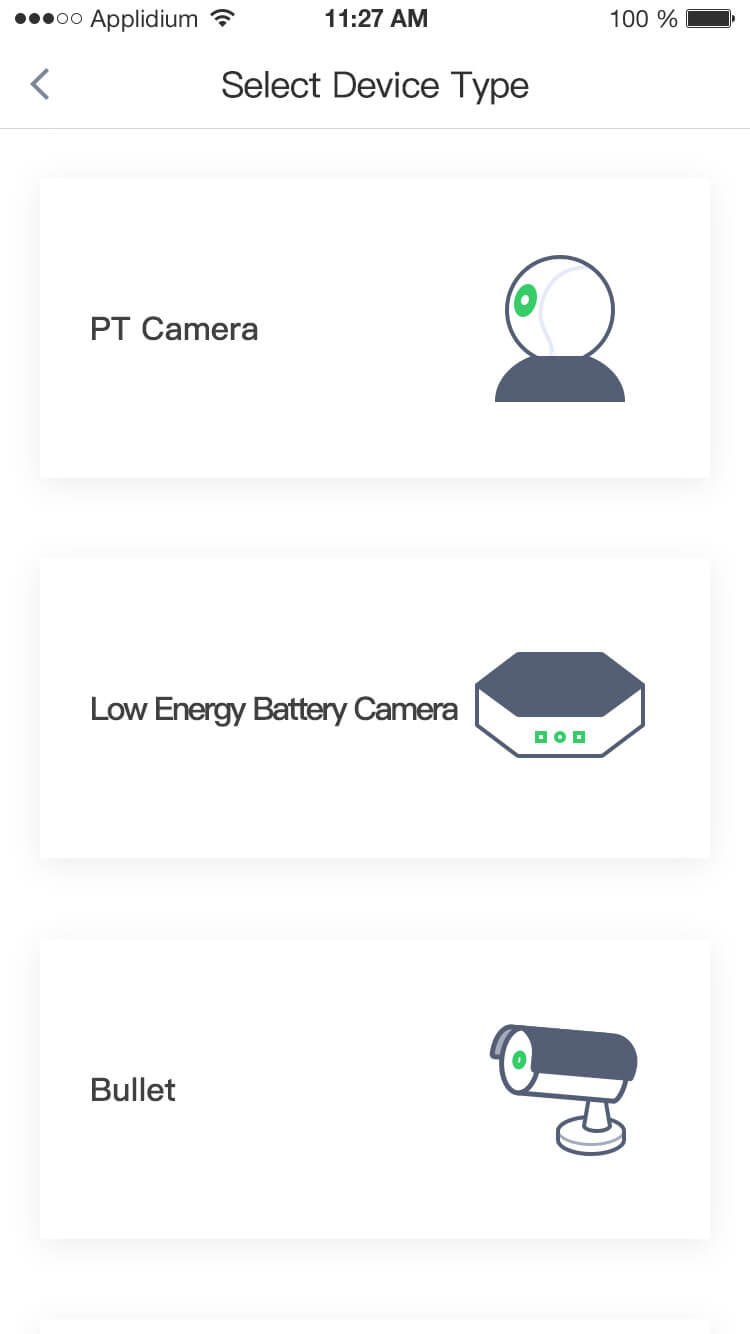
3). Click the “+” icon on the upper right corner of the page, as shown in picture 1. Then, the page jumps to “Select Device Type”, as shown in picture 2, where select “Cube Camera”;
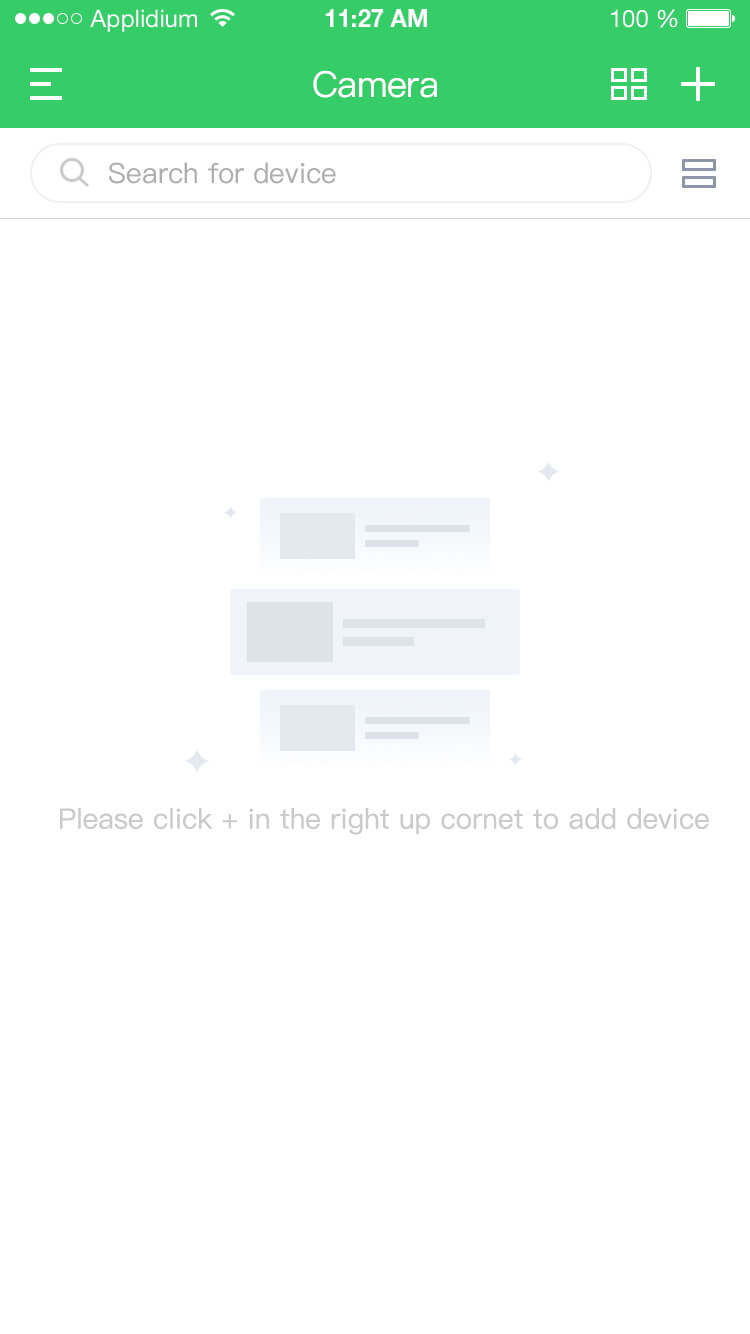
Picture 1
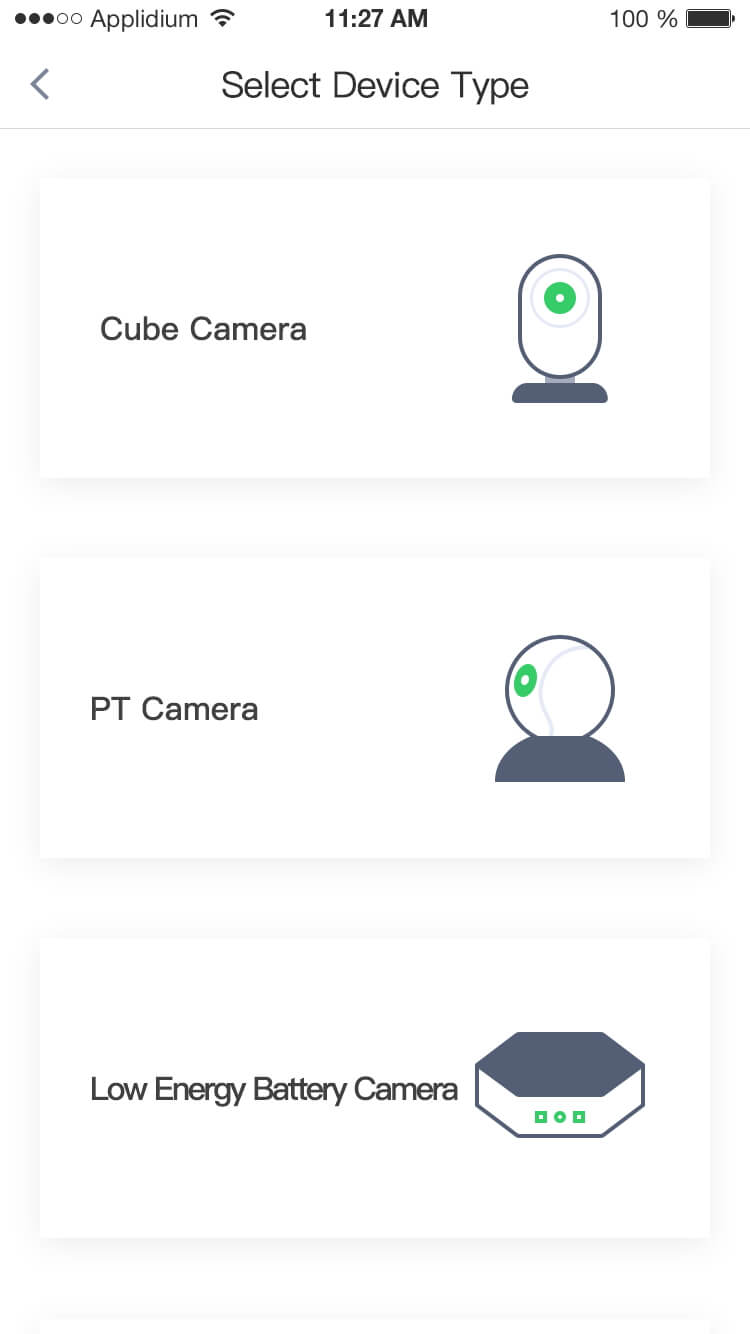
Picture 2
4). Plug in the power adapter, and check whether the camera power indicator lights up or not, as shown in picture 3 below:
5). Press and hold the ‘Set’ button on the camera, wait for the camera sending a voice prompt of " Wait for receiving WIFI configuration information ", and click "I have heard the voice", as shown in picture 4 below:
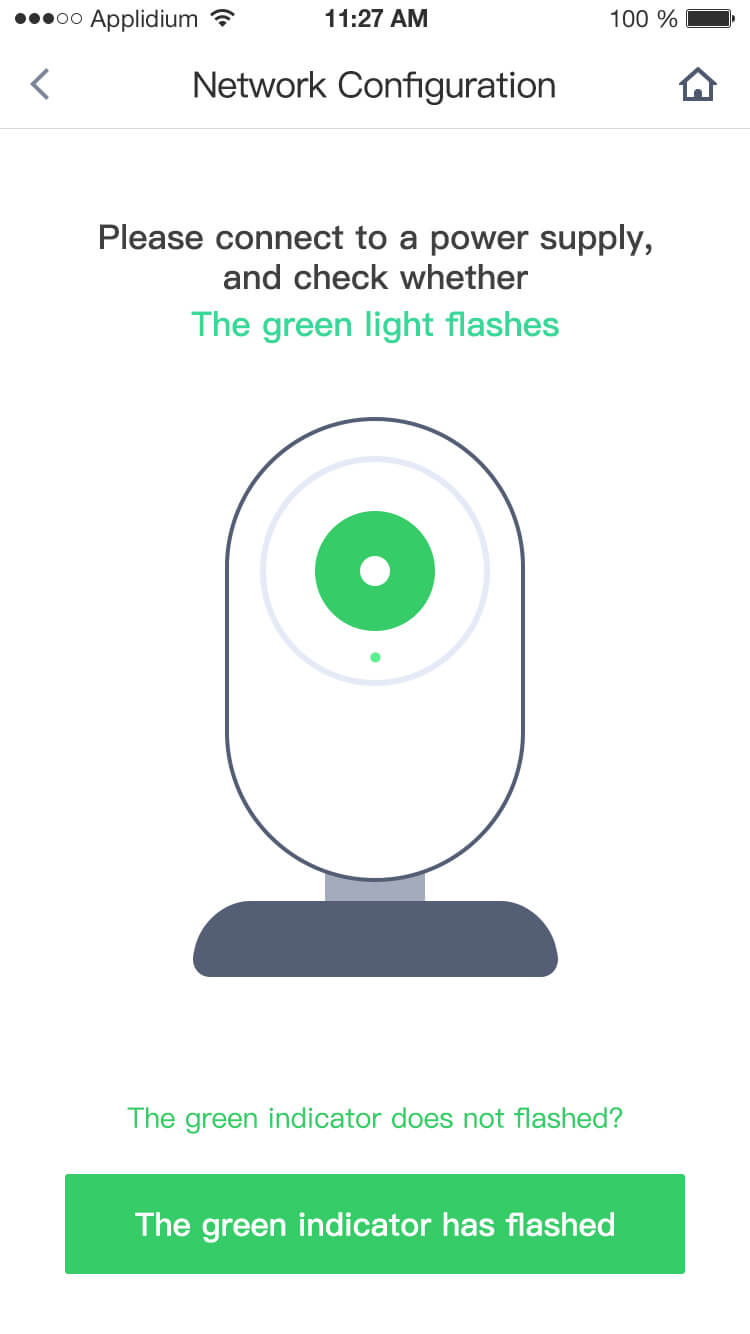
Picture 3
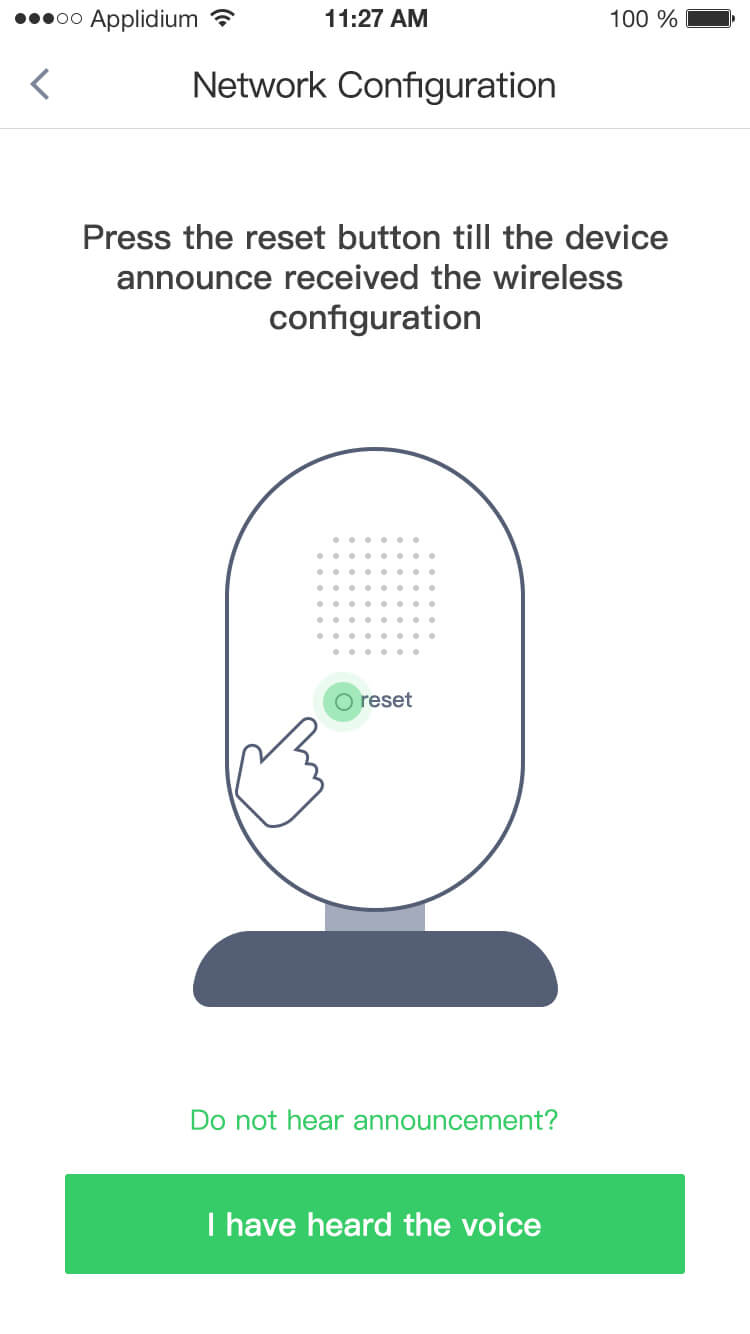
Picture 4
6). Choose a WIFI network for the camera, enter the Wi-Fi password and click "Connect WIFI network", as shown in picture 5 below:
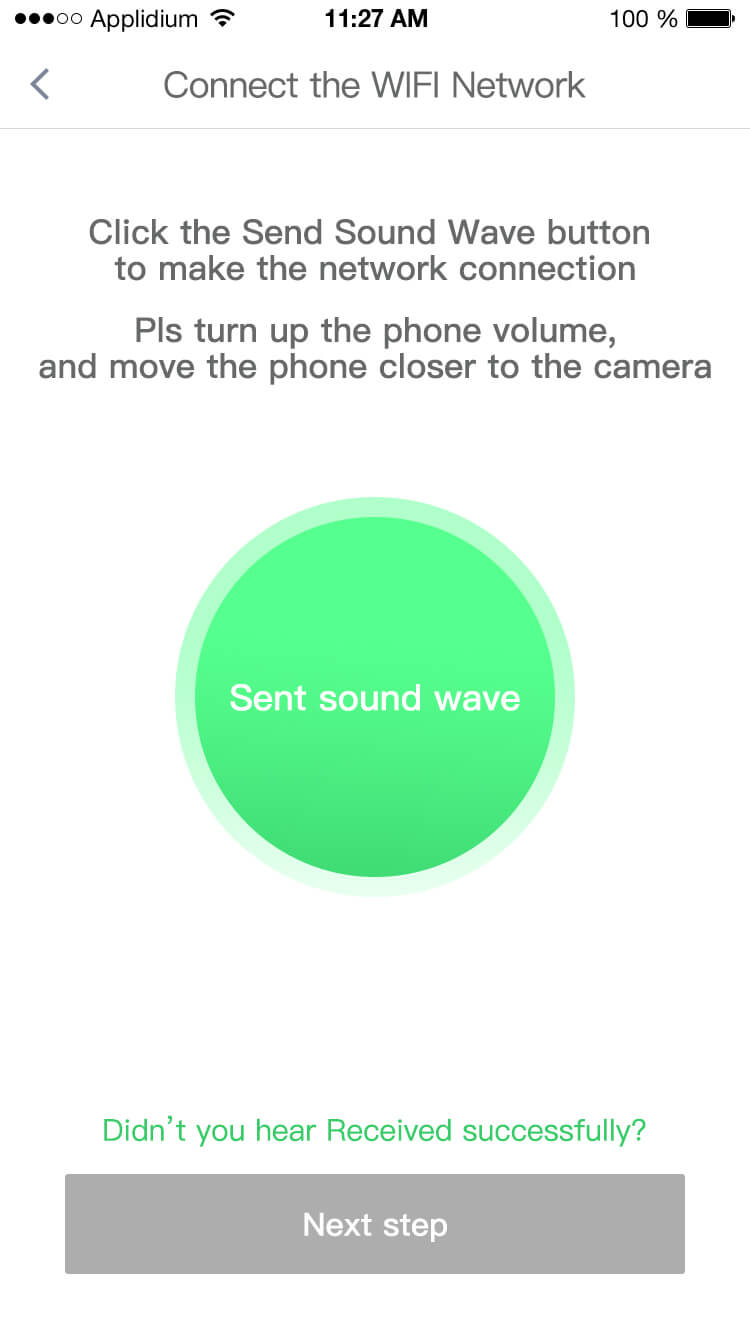
7). Click the "Send sound wave" button. After hearing a voice prompt of "Received successfully" from the camera, click "Next", as shown in picture 6 below:
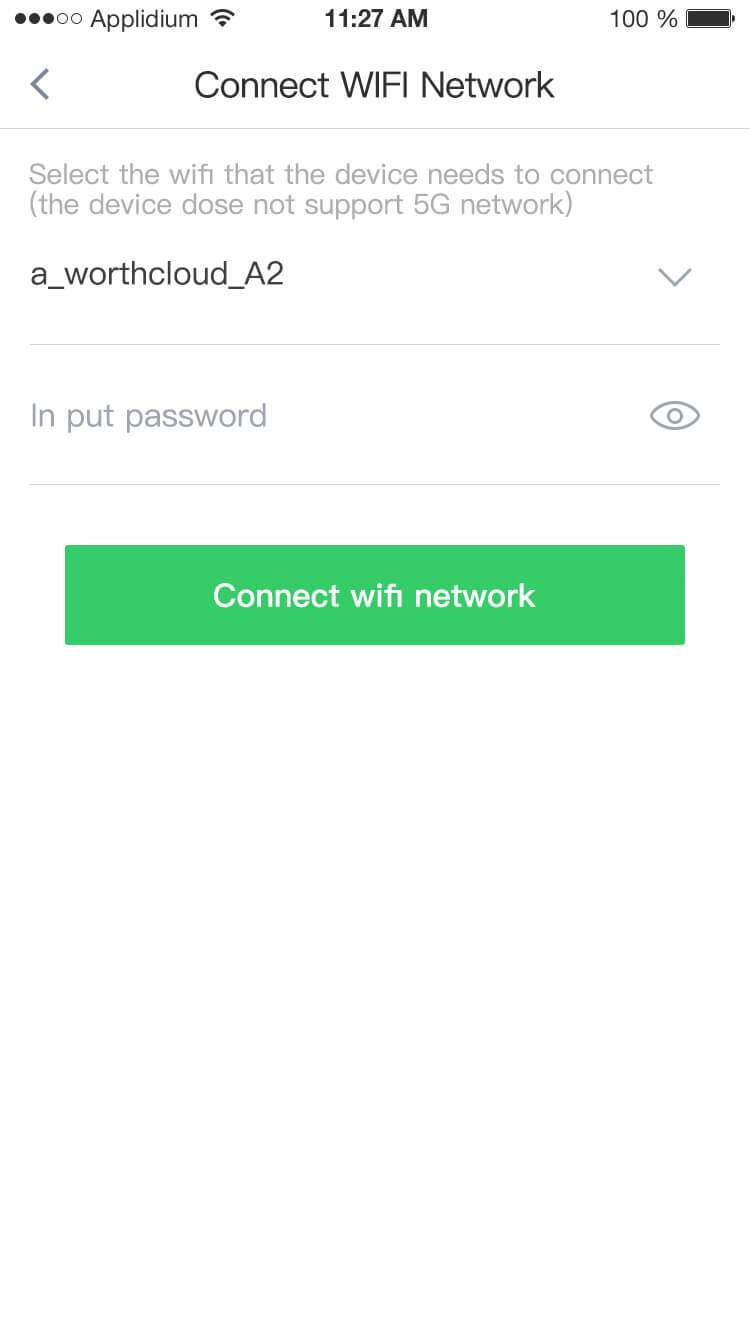
Picture 5

Picture 6
8). While the camera is connecting, it will stay on the countdown page of “Connect to WIFI network”, as shown in picture 7 below.
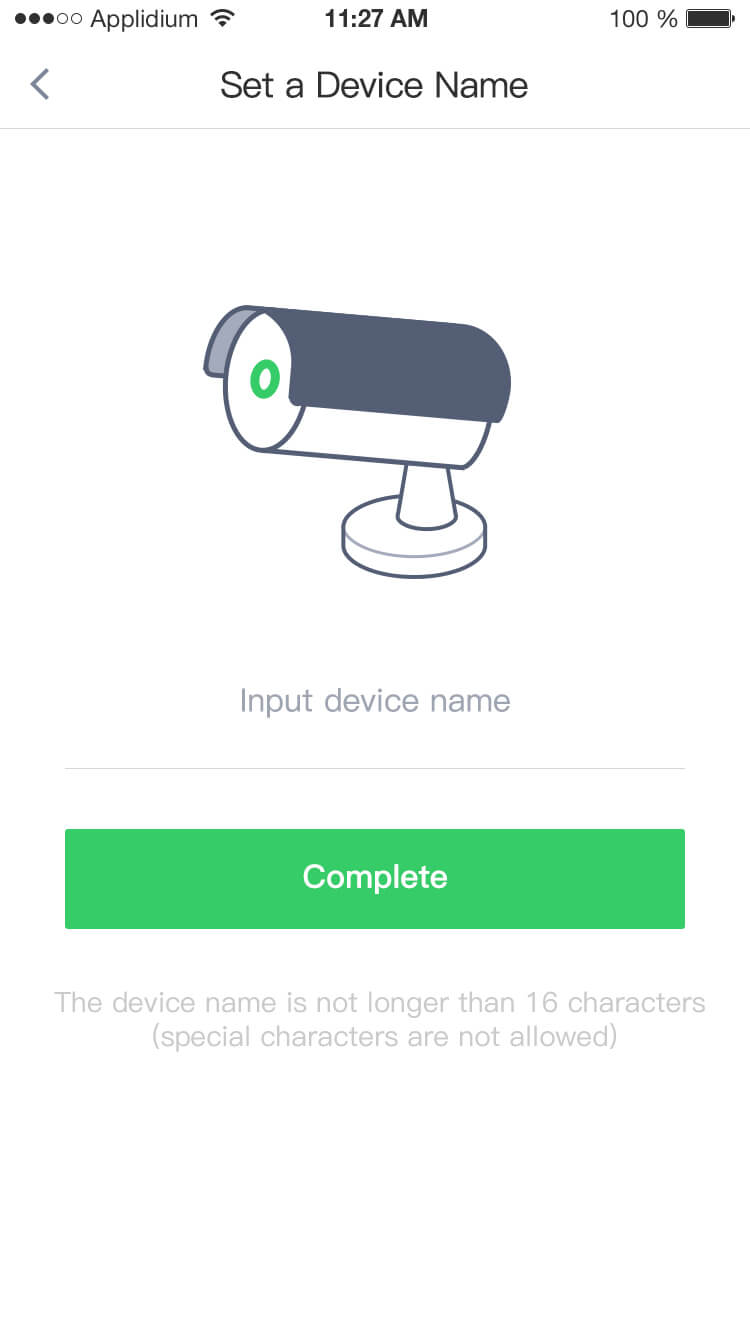
9). The page will jump to ‘Set the device name’ page until you hear a voice prompt of “Wifi connection successful ” , as shown in picture 8 below:
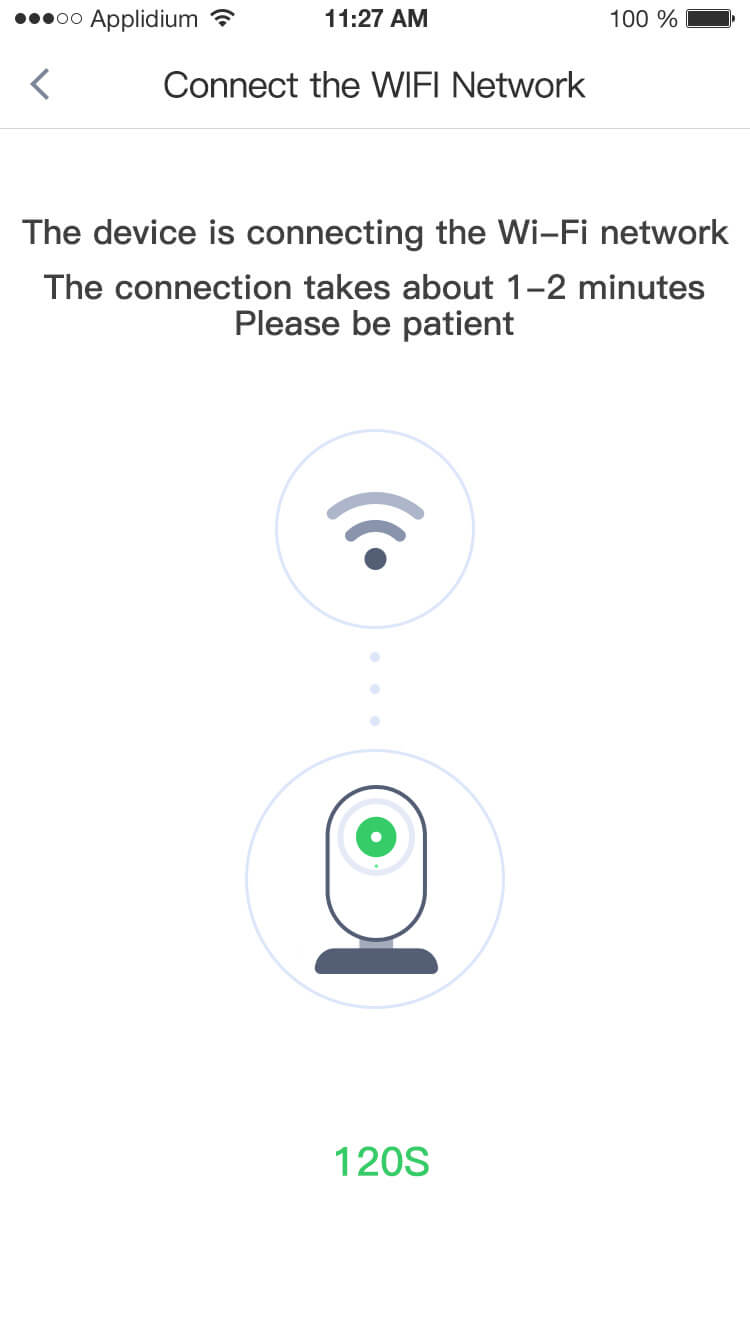
Picture 7
Picture 8
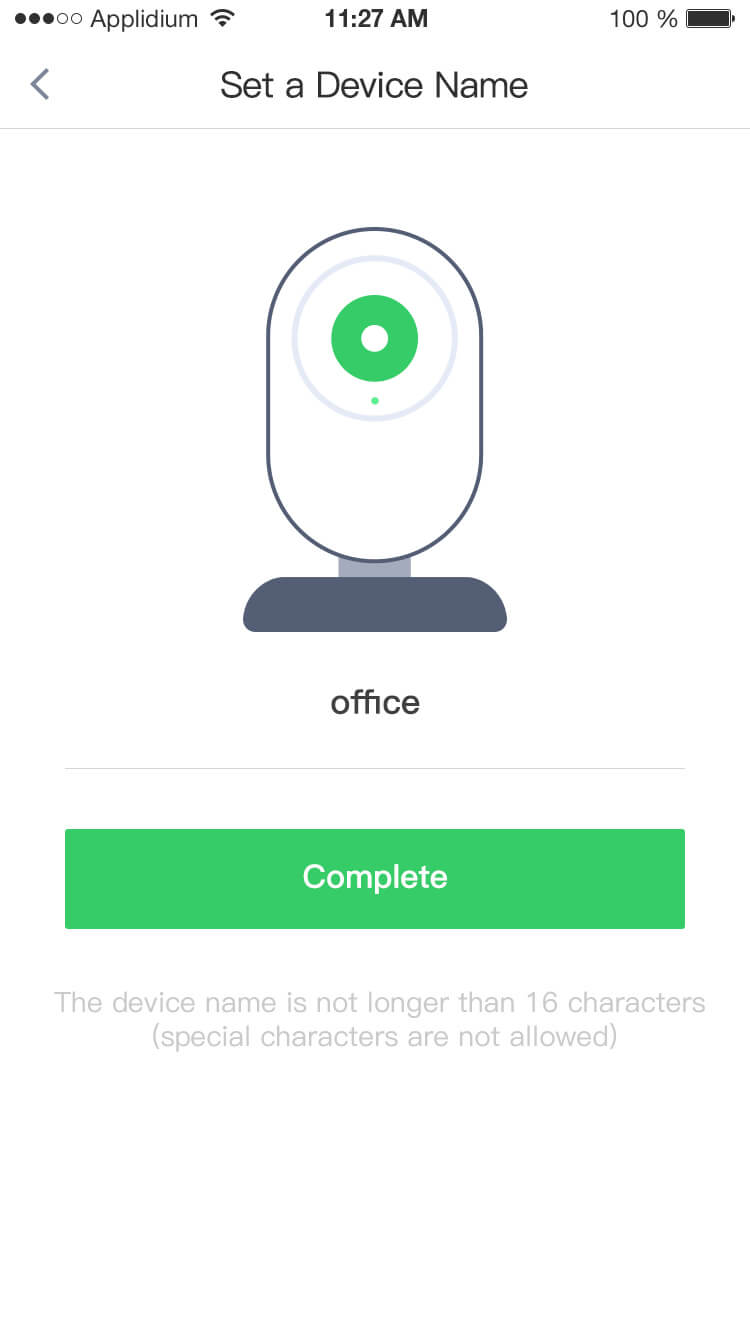
10). Set the camera name and then click “Complete” button, after the camera is added, the page will jump to “Device List”, as shown in picture 9 below:

Picture 9
3. Real Time Video Preview
1). Open the Smarwo App and chick the camera to activate it, and then enter the real-time video preview interface, as shown in picture 10 below:

Picture 10
4. For further support, please check out the online documentation in Smarwo.
Instructions for Easy Operation of Elite PT Camera — R2P1、R2P2
1. Download and install APP
1). Scan the QR codes shown below or search for “Smarwo” in APP Store or Google Play to download and install it;
2. Add Camera in the Smarwo
1). Connect your mobile phone to 2.4G WIFI network.(support 2.4G only);
2). Start the “Smarwo” APP, register and log in;
3). Click the “+” icon on the upper right corner of the page, as shown in picture 1. Then, the page will jump to “Select Device Type”, please select “PT camera”, as shown in picture 2,
Picture 1
Picture 2
4). Plug in the power adapter, and check whether the camera power indicator lights up or not, as shown in picture 3 below:
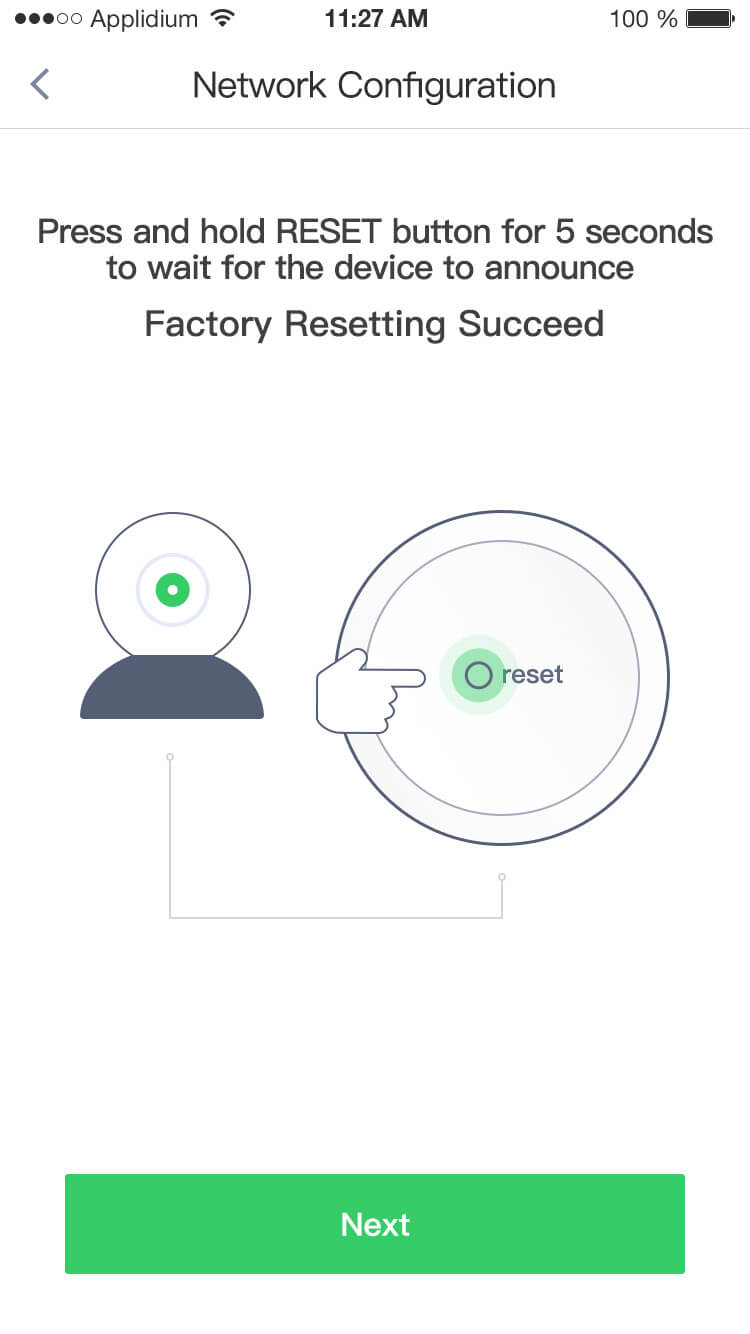
5). Press and hold the reset button on the camera. After the camera sending a voice prompt of "Restore successfully", click "Next" as shown in picture 4 below:

Picture 3
Picture 4
6). Choose a WIFI network for the camera, enter a password, and click “Connect WIFI network”, as shown in picture 5 below:
7). Click the "Send sound wave" button. After hearing a voice prompt of "Received successfully", click "Next" as shown in picture 6 below:

Picture 5

Picture 6
8).Set the camera name and click “ Complete ” button, as shown in picture 7 below.
9). After the camera is added, the page will jump to “Device List”, as shown in picture 8 below:

Picture 7
Picture 8
3. Real Time Video Preview
1). Open the Smarwo App and click the camera to activate it, and then enter the real-time video preview interface, as shown in picture 9 below:

Picture 9
4. For further support, please check out the online documentation in Smarwo.
Instructions for Easy Operation of Primier PT Camera — R2S1、R2S2
1. Download and install APP
1). Scan the QR codes shown below or search for “Smarwo” in APP Store or Google Play to download and install it;
2. Add Camera in the Smarwo
1). Connect your mobile phone to 2.4G WIFI network.(support 2.4G only);
2). Start the “Smarwo” APP, register and log in;
3). Click the “+” icon on the upper right corner of the page, as shown in picture 1. Then, the page will jump to “Select Device Type”, please select “PT camera”, as shown in picture 2,
Picture 1
Picture 2
4). Plug in the power adapter, and check whether the camera power indicator lights up or not, as shown in picture 3 below:
5). Press and hold the reset button on the camera. After the camera sending a voice prompt of "Restore successfully", click "Next" as shown in picture 4 below:
Picture 3
Picture 4
6). Choose a WIFI network for the camera, enter a password, and click “Connect WIFI network”, as shown in picture 5 below:
7). Click the "Send sound wave" button. After hearing a voice prompt of "Received successfully", click "Next" as shown in picture 6 below:
Picture 5
Picture 6
8).Set the camera name and click “ Complete ” button, as shown in picture 7 below.
9). After the camera is added, the page will jump to “Device List”, as shown in picture 8 below:
Picture 7
Picture 8
3. Real Time Video Preview
1). Open the Smarwo App and click the camera to activate it, and then enter the real-time video preview interface, as shown in picture 9 below:
Picture 9
4. For further support, please check out the online documentation in Smarwo.
Instructions for Easy Operation of Wi-Fi Bullet Camera — G3S1, G3S2
1. Download and install APP
1). Scan the QR codes shown below or search for “Smarwo” in APP Store or Google Play to download and install it;
2. Add Camera in the Smarwo
1). Connect your mobile phone to 2.4G WIFI network.(support 2.4G only);
2). Start the “Smarwo” APP, register and log in;
3). Click the “+” icon on the upper right corner of the page, as shown in picture 1. Then, the page jumps to “Select Device Type”, please select “Wi-Fi Bullet Camera”, as shown in picture 2;
Picture 1

Picture 2
4). Plug in the power adapter, and connect the camera to the router via Ethernet cable;
5). Scan the QR code posted on the camera; or click the “Edit” button on the upper right corner to manually enter the camera ID, then click “Next”, as shown in picture 3 and picture 4 below;

Picture 3
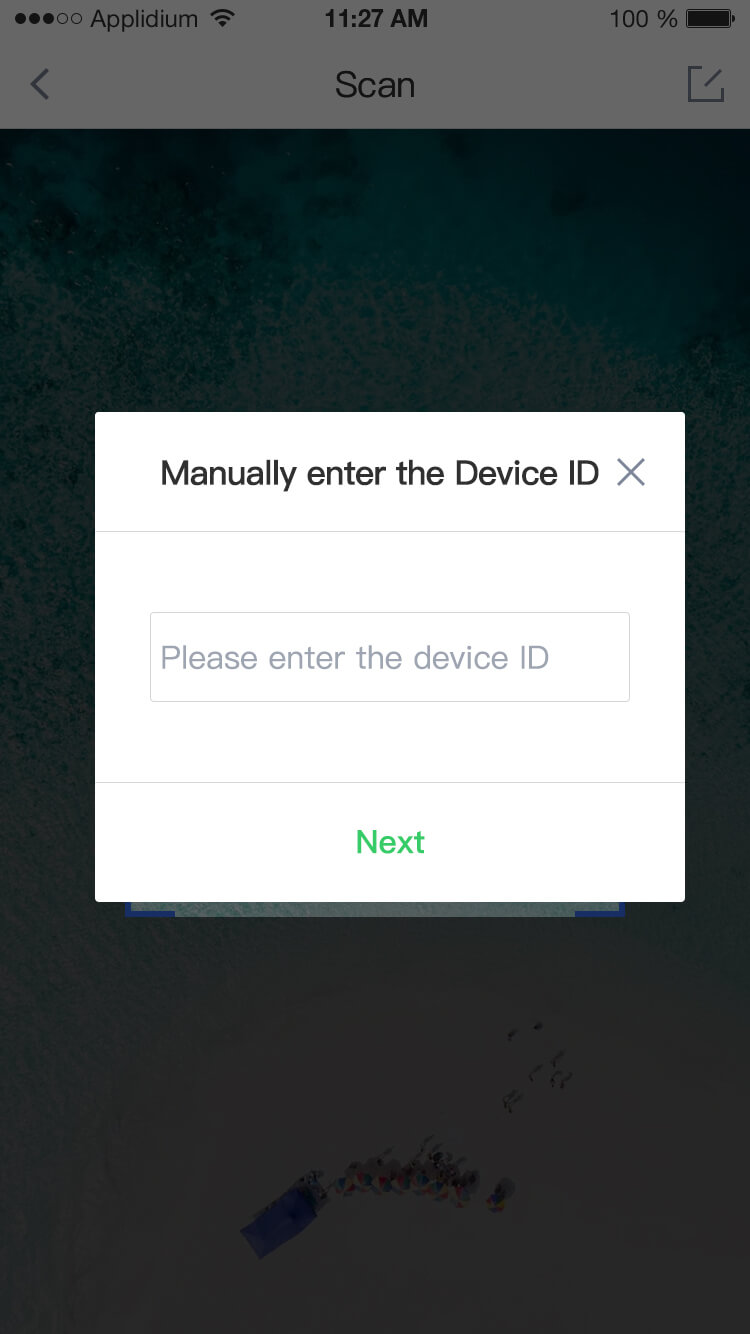
Picture 4
6). After setting the name for your camera, please click “Complete” button, as shown in picture 5 below.
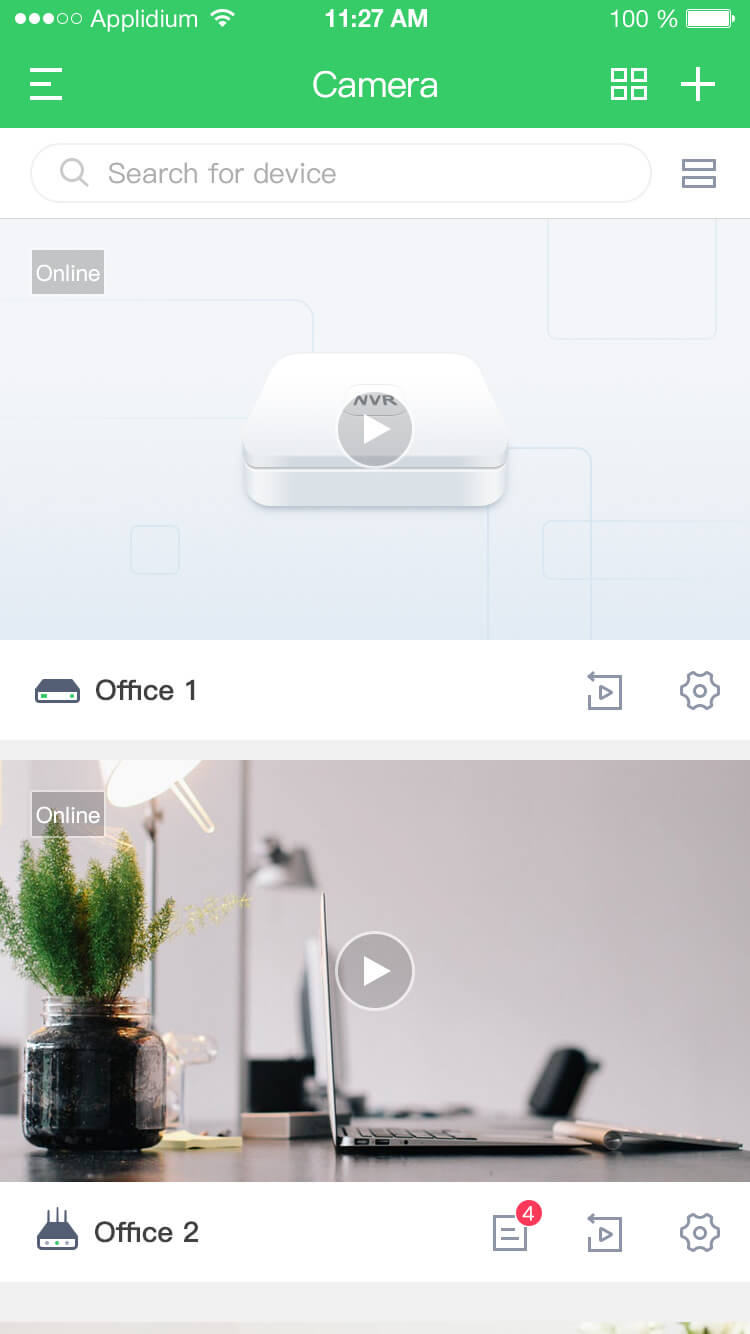
7). After the camera is added, the page will jump to “Device List”, as shown in picture 6 below:
Picture 5

Picture 6
3.Real Time Video preview
1). Open the Smarwo App and select a Camera, click to activate it and enter the real-time video preview interface, as shown in picture 7 below:

Picture 7
4. For further support, please check out the online documentation in Smarwo.
Use Instructions
1.App Installation
Search for”Smarwo”in the APP Store (for iPhone) / Google Play(for Android) from your mobile device to download and install the APP.
2. Set Up an Account
2.1 Account Register
Open the Smarwo App:
【1】Enter the “ Login ” page(Support email login);
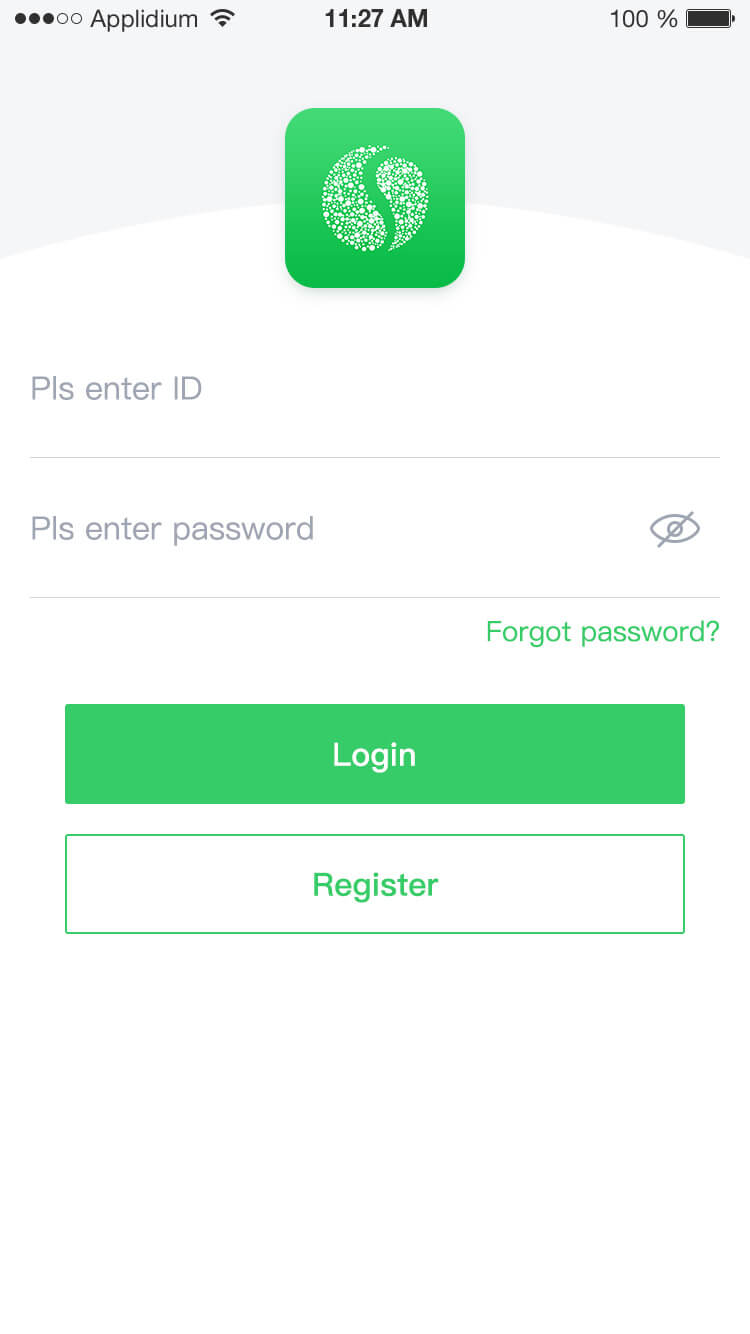
【2】Click "Register" to enter the “ Registration ” page (support email registration);
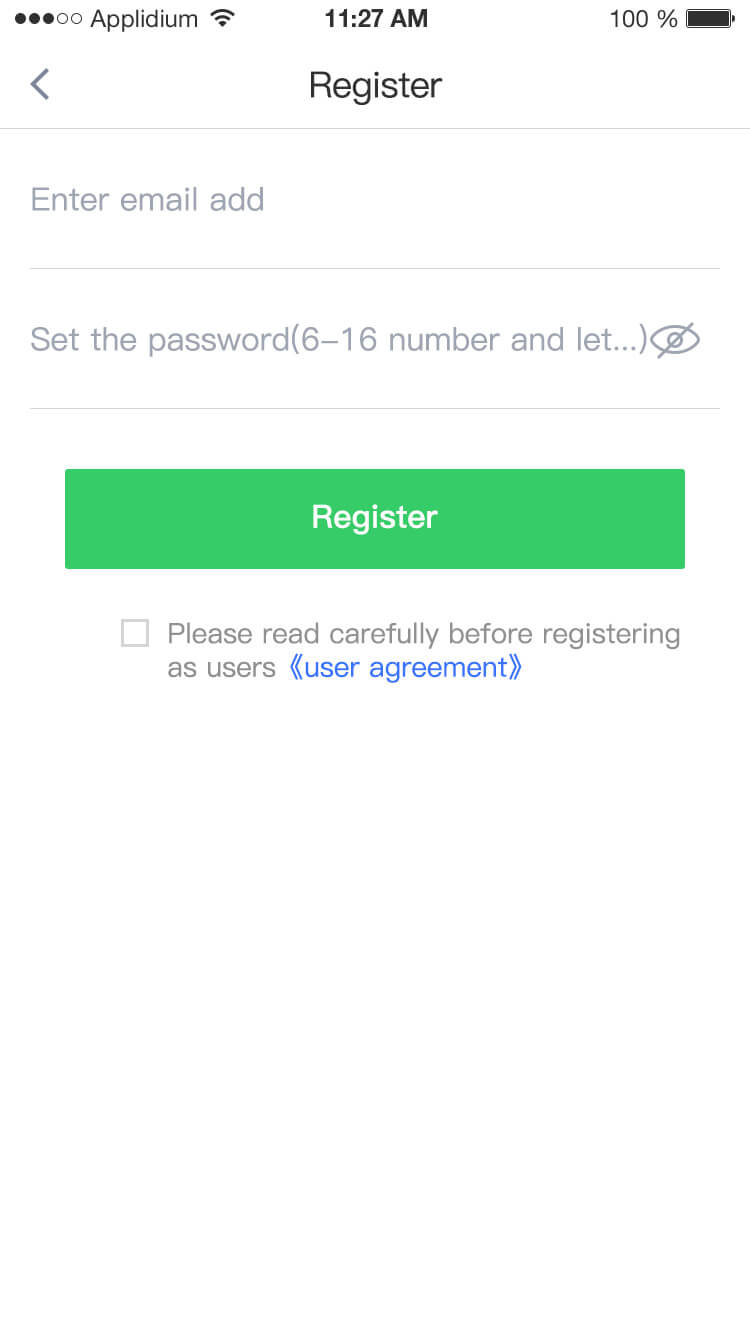
Enter the email address and set the password (Your Password must be a combination of alphanumeric characters of 6-16 characters in length).
Click the icon behind password to show the password.
Click the "Register" button and the page jumps into the "Login" page and the account registration is completed
2.2 Account Login
【1】After the registration is completed, you can use the account to login the APP.

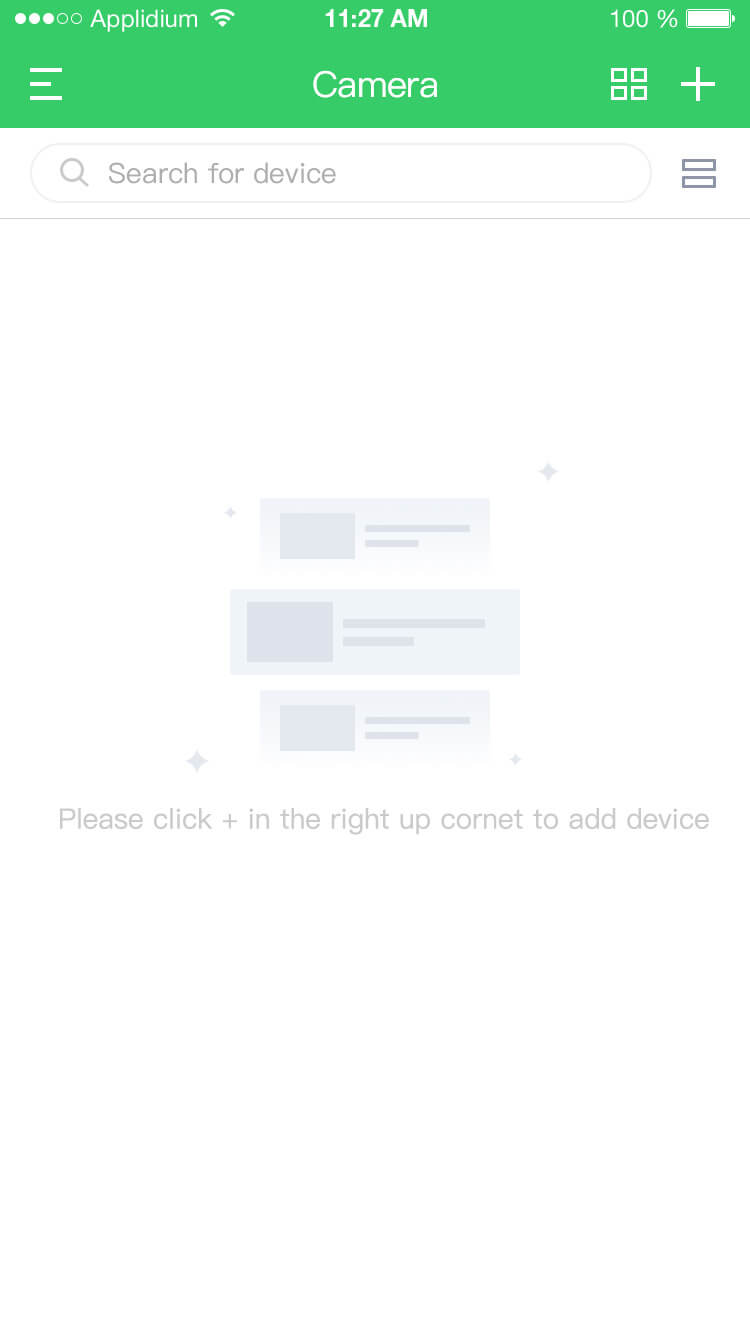
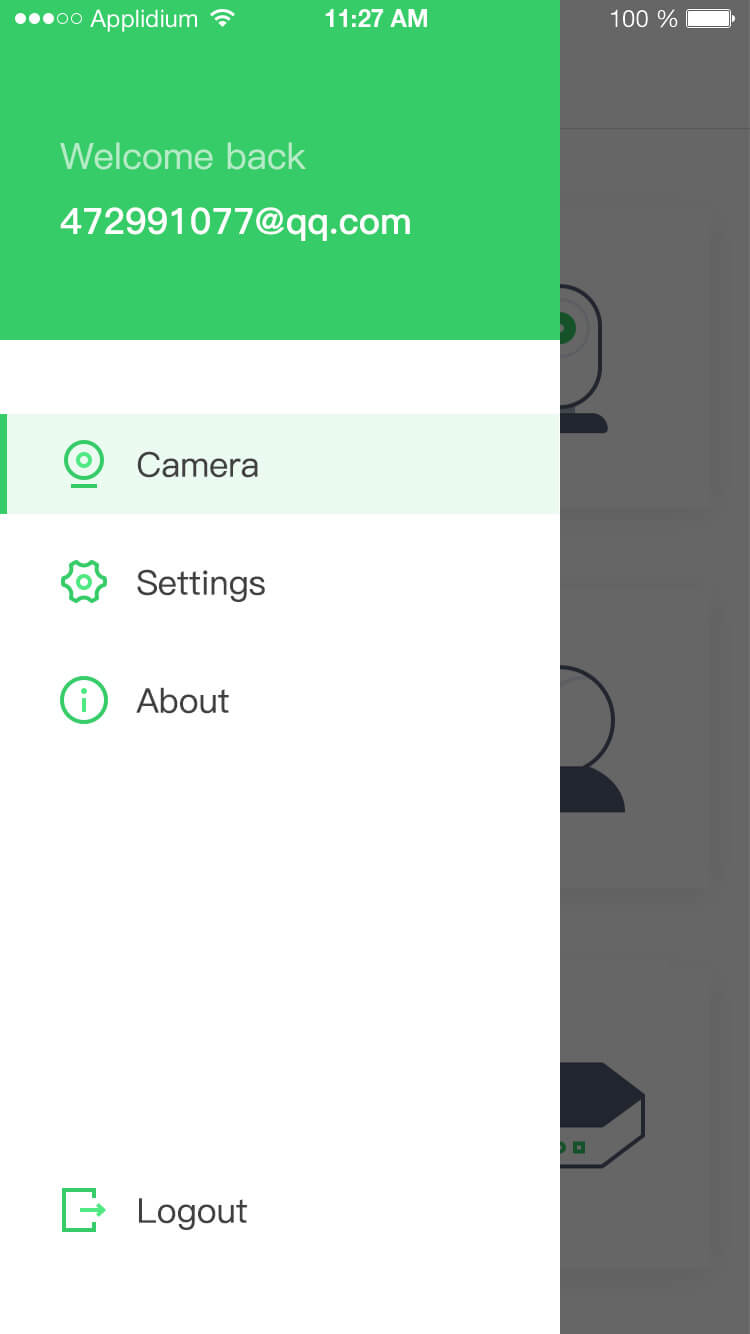
【2】After login your account, you will see a blank device list because of new account.

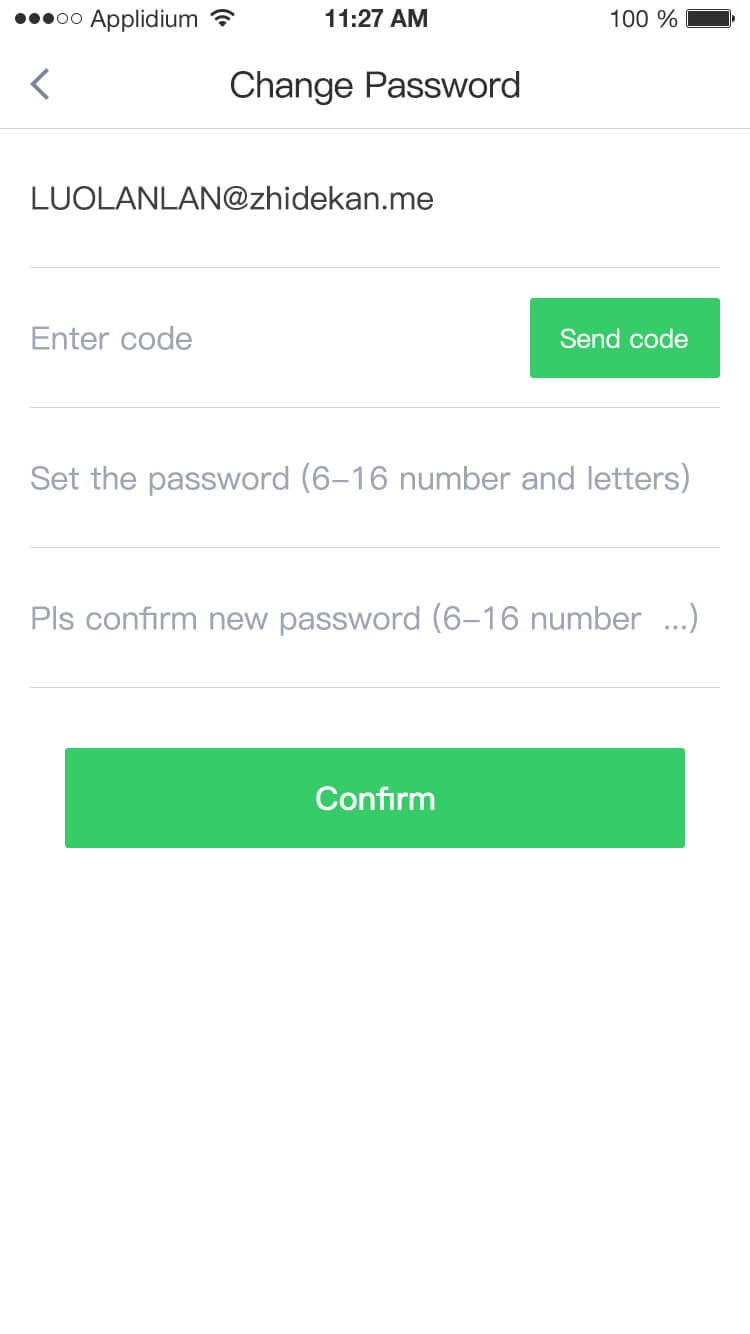
2.3 Forgot Password
【1】Login page, click "Forgot Password";

【2】Enter your account (email address for registration) and click "Send verification code “;
【3】Enter the verification code received by the mailbox;
【4】Set a new password (Your Password must be a combination of alphanumeric characters of 6-16 characters in length) and confirm the new password again. Click “Confirm”to change the password.
2.4 Logout Account
As below, click "Logout" to exit the application.
3. Add Device
【1】Click "+" in the upper-right corner, jump to the "Select device type" page, select the appropriate device type, and go to the next step;(PT camera adding process)
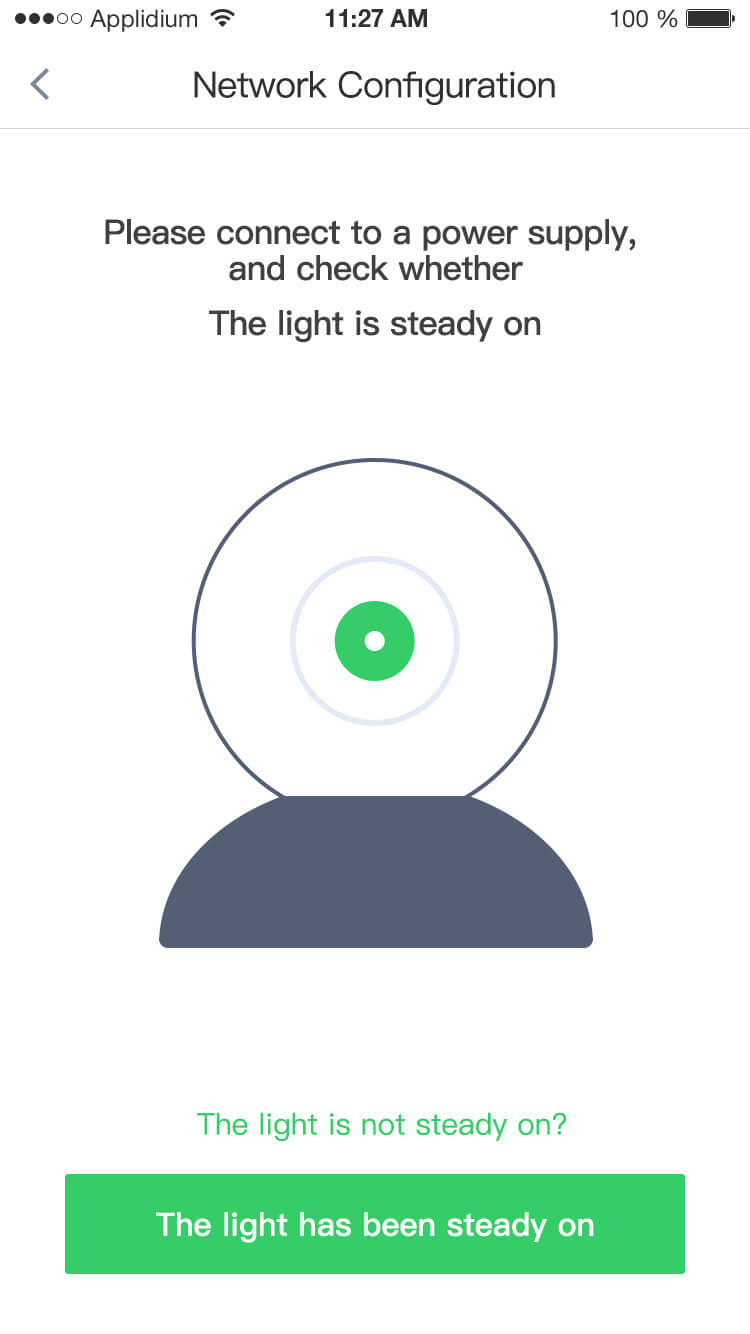
【2】In device type page, select the “ PT camera ”and jump to “Network Configuration ”;

【3】Plug Device in power, wait for a moment, until the device's light is steady on, and click the "The light has been steady on" to next step;

【4】Follow the prompts, press the "Settings" button, after hear the voice prompt, then click to next step;

【5】Wi-Fi connection. To ensure the success of device connection, please enter the correct Wi-Fi password (the device does not support 5G network) and click "Connect wifi network" to enter next step;
【6】Click the "Send sound wave" button and after prompt of "Receive success" ,go to next step;
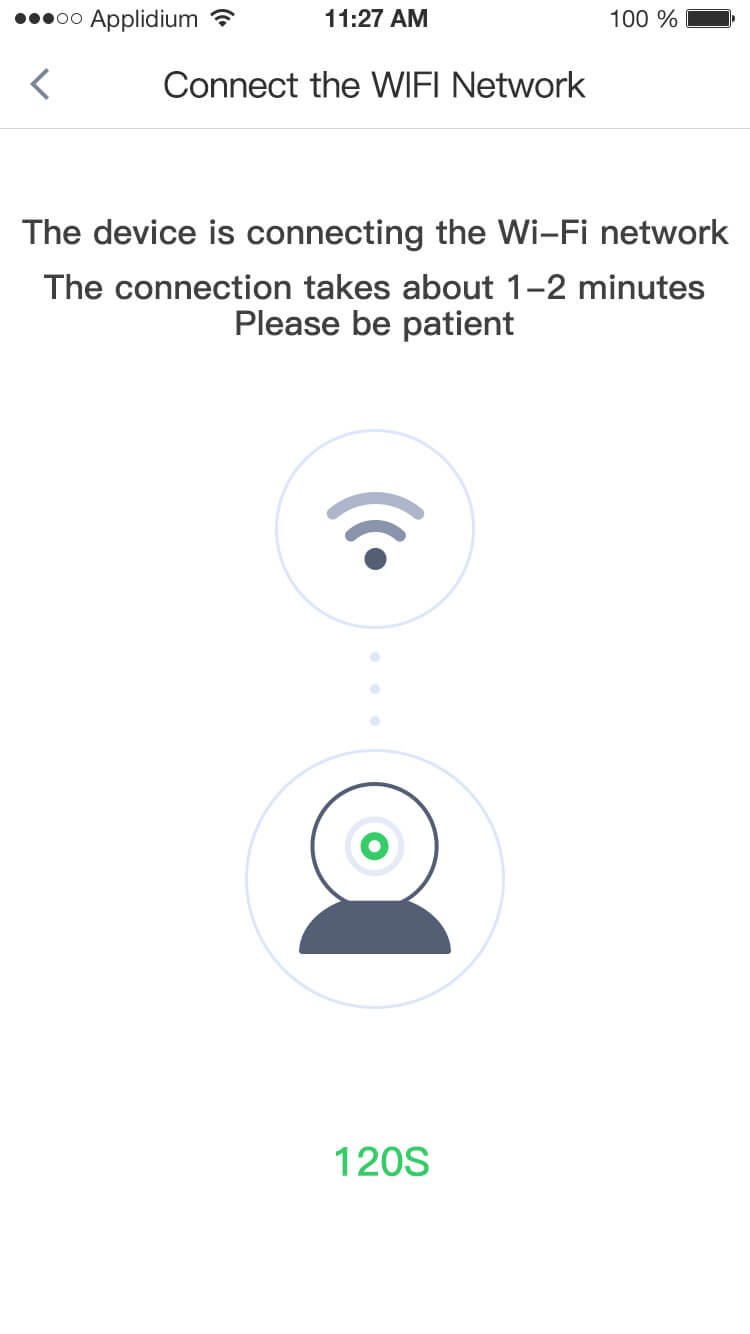
【7】The device will connect successfully within 2 minutes, click next to enter “Set a device name ”page;
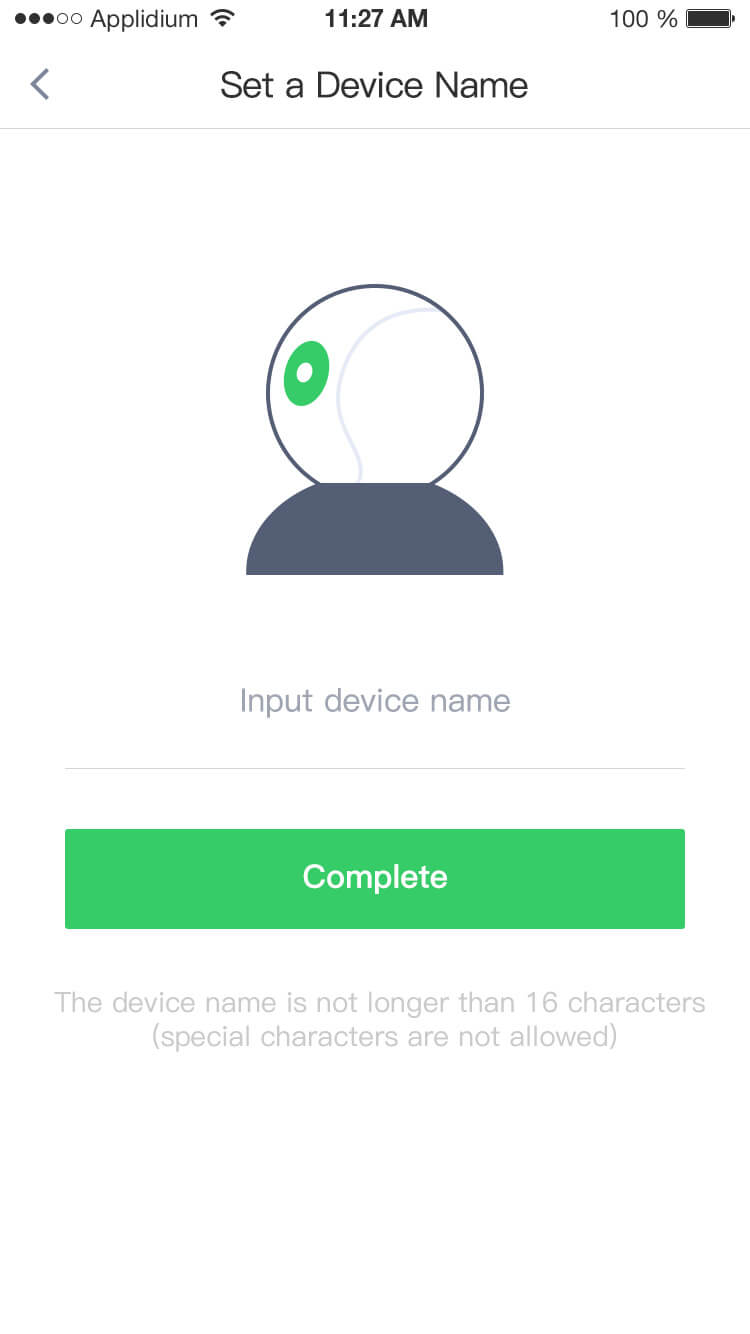
【8】Enter device name, click "Done", device connection success, then enter device list page.

【9】The device can be searched according to the "Device name", as below:

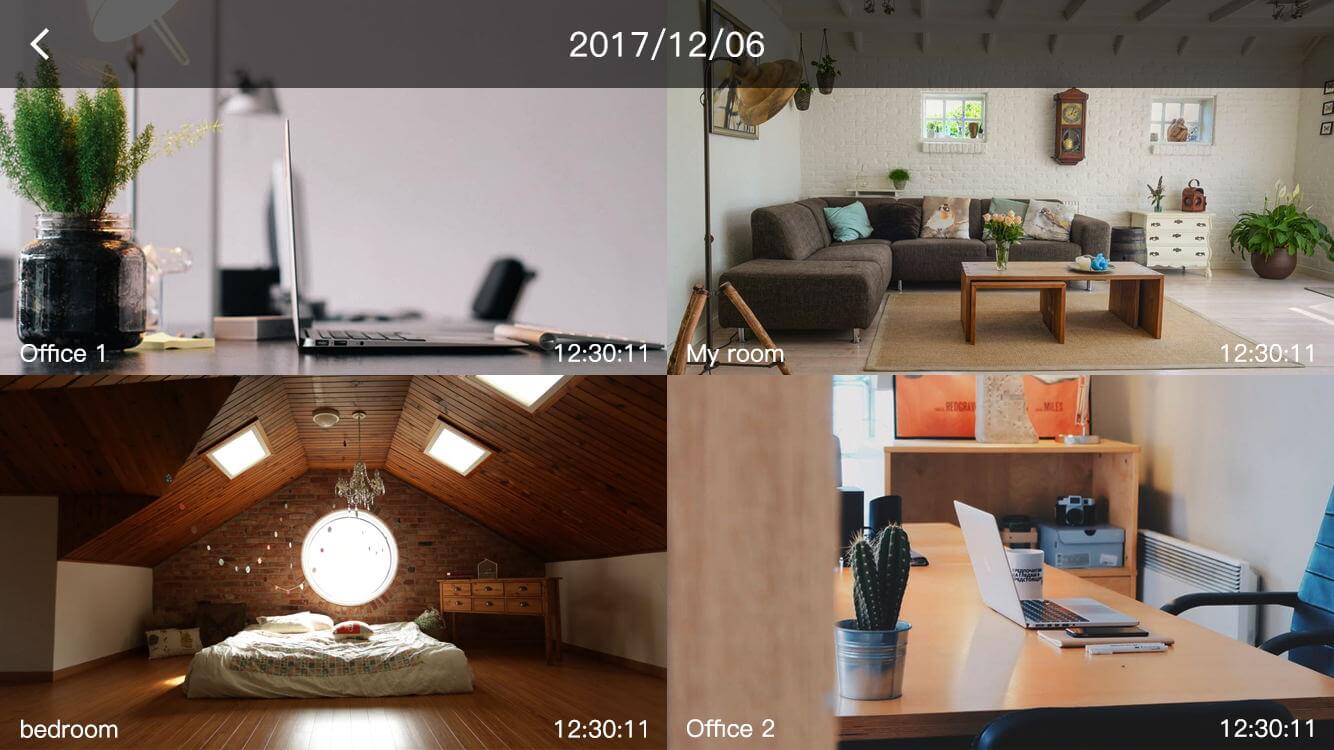
【10】Click on the icon on the left of "+" and watch live video on a four - split screen, as below:
4. Device Management
4.1 View Real-time Video
After adding device, there will be a device in the device list, click the list to view live video;

4.2 View Playback
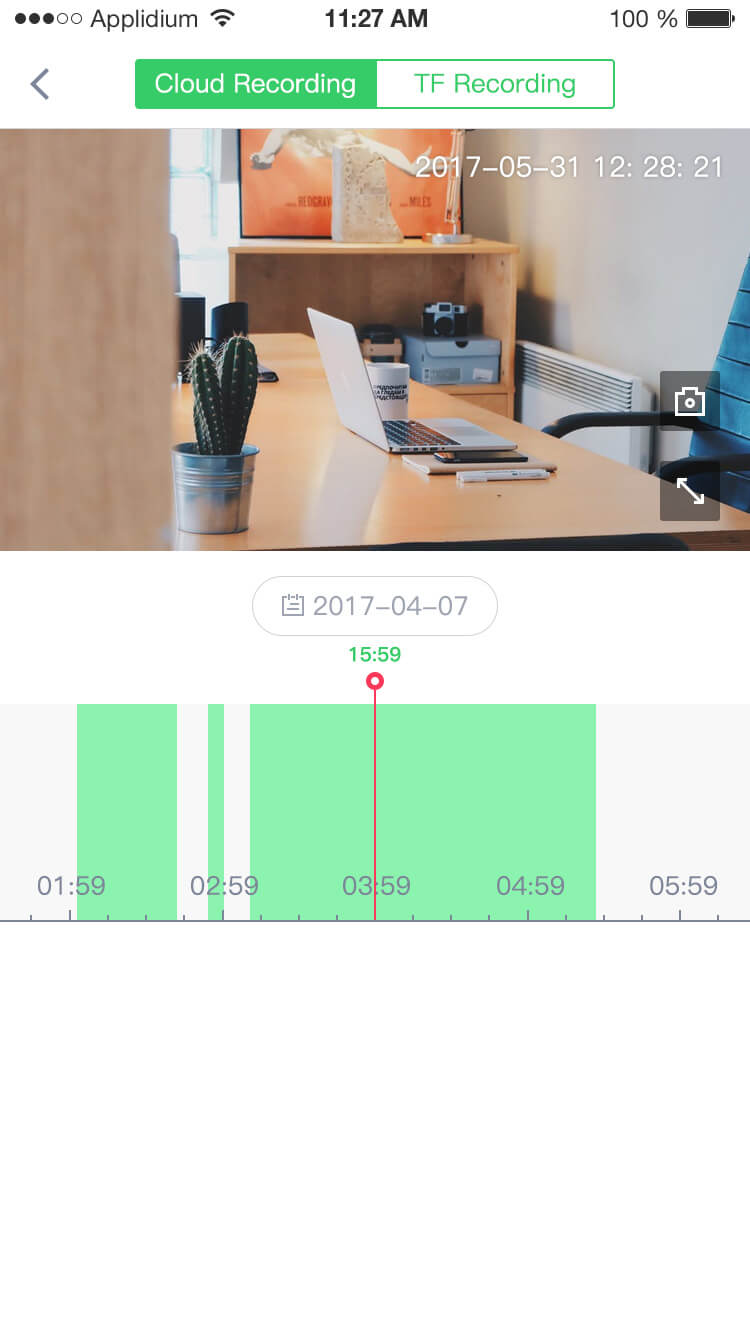
【1】Select TF card playback, enter “ TF card recording ” page (Device is required to insert TF card), as below:

【2】Select cloud recording to enter the “ Cloud recording ” page (Device is required to open cloud storage service), as below:
4.3 Device Operation
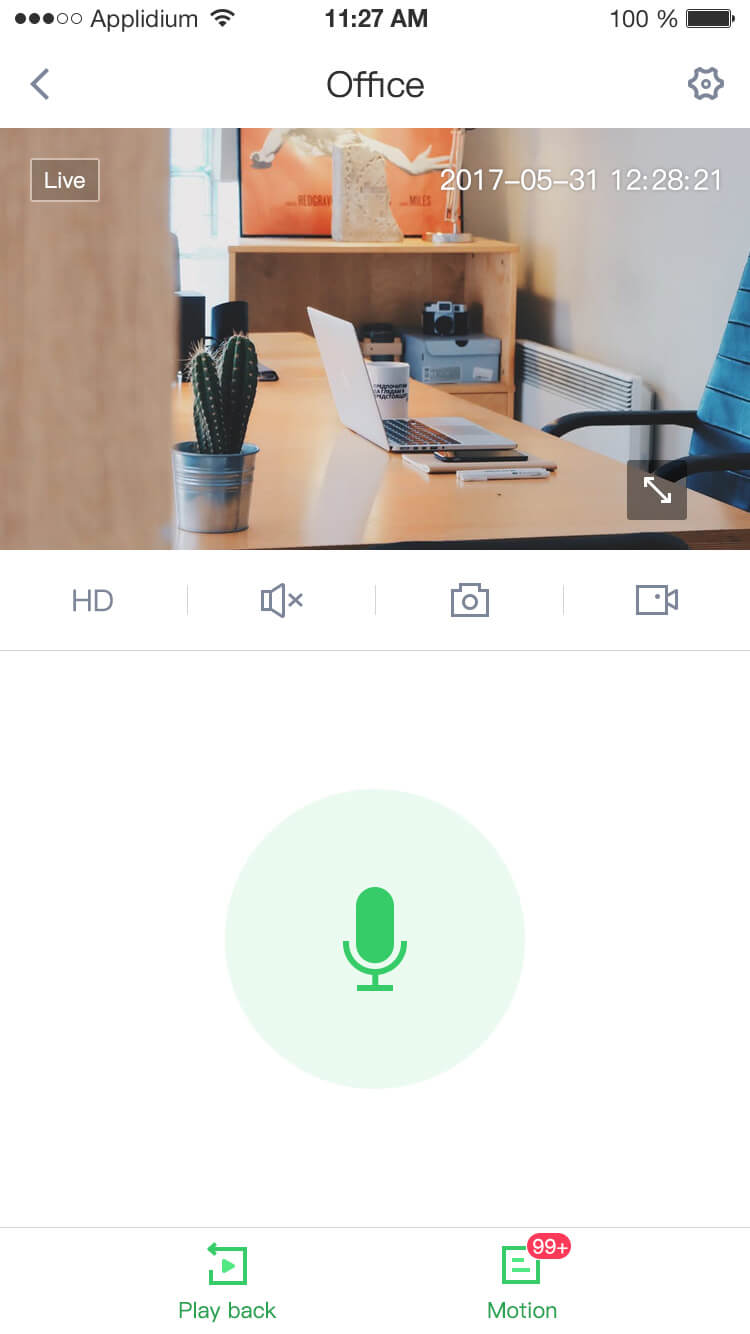
【1】Click on the icon on the lower right corner of the device to view live video of full screen.

【2】There are 4 buttons in the play page: Video clarity (which can be adjusted to be smooth, SD and HD mode), Video sound switch (turn on/off video sound), Video screenshot button (screenshot saved in the screenshot list), Video Recording button (video file saved in mobile phone);
4.4 Screenshot List
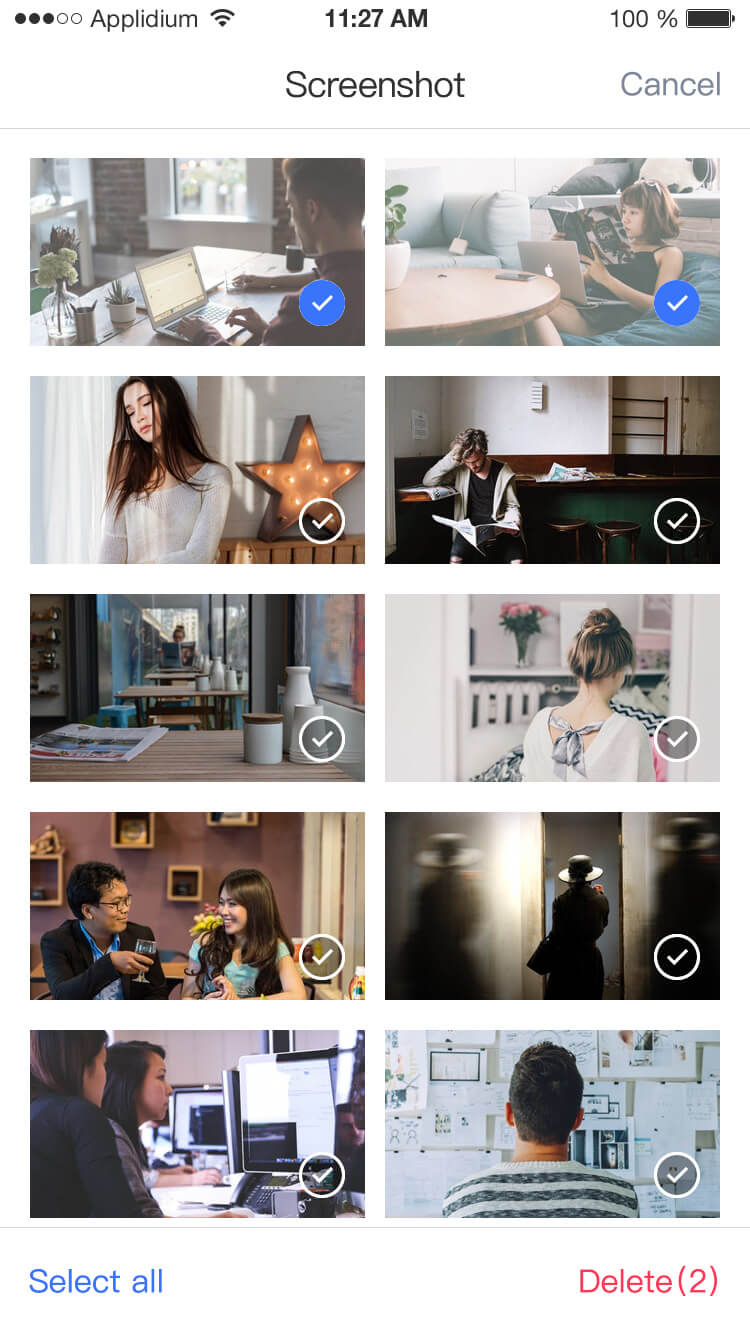
【1】Click "screenshot" on the left corner bottom of video, jump to the “ screenshot list ”, as below:
Scroll up to load more screenshot, scroll down to refresh screenshot list, click "Edit" could delete screenshot in batches;

4.5 Event Alarm List
【1】In the top right corner of the “ Cloud Recording ” page, click “ Motion ” to enter to the event list page, as below:
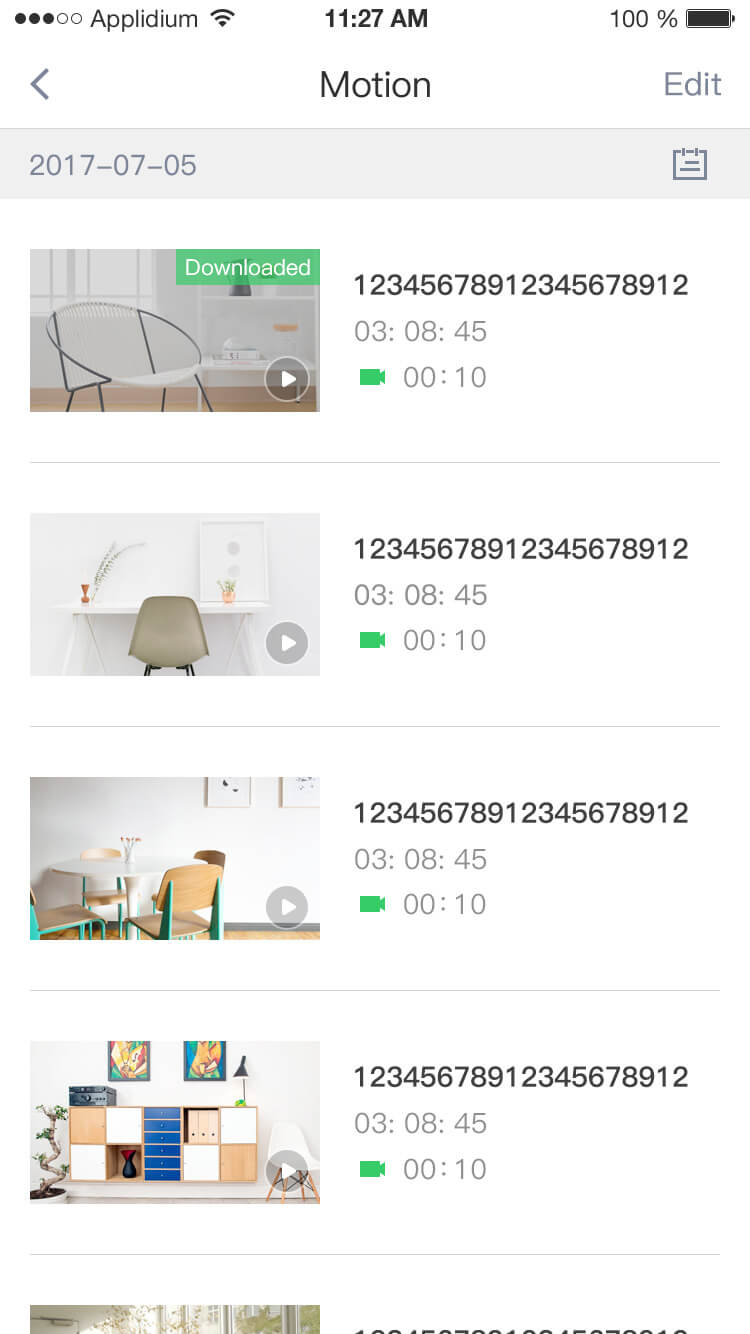
Click on a single event in the event list to enter “Event playing”page, as below:

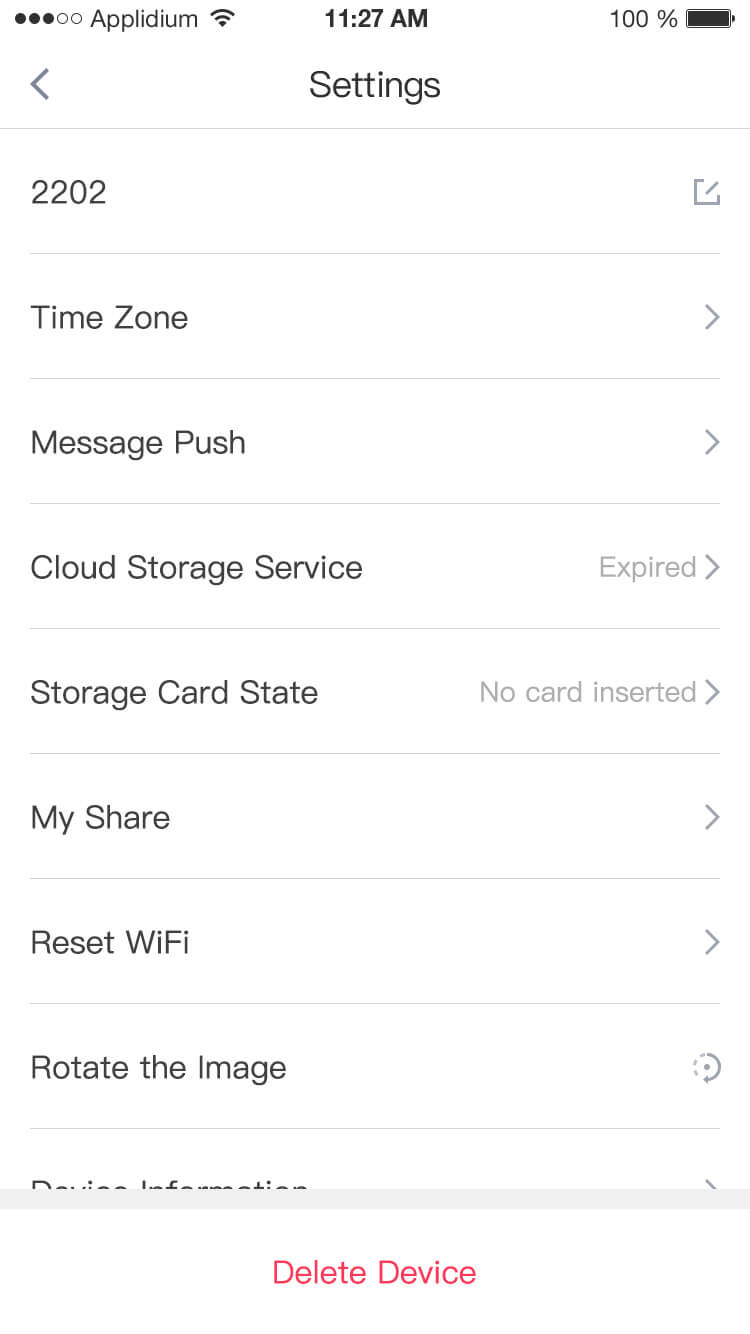
4.6 Device Setting
4.6.1 Change Device Name
Click the upper right corner video icon to enter "Camera settings" page, as below:
Click the icon on the right side of camera name to jump to “Change device name”page;

Enter a new name of the device, click "Done", then modify device name successfully;
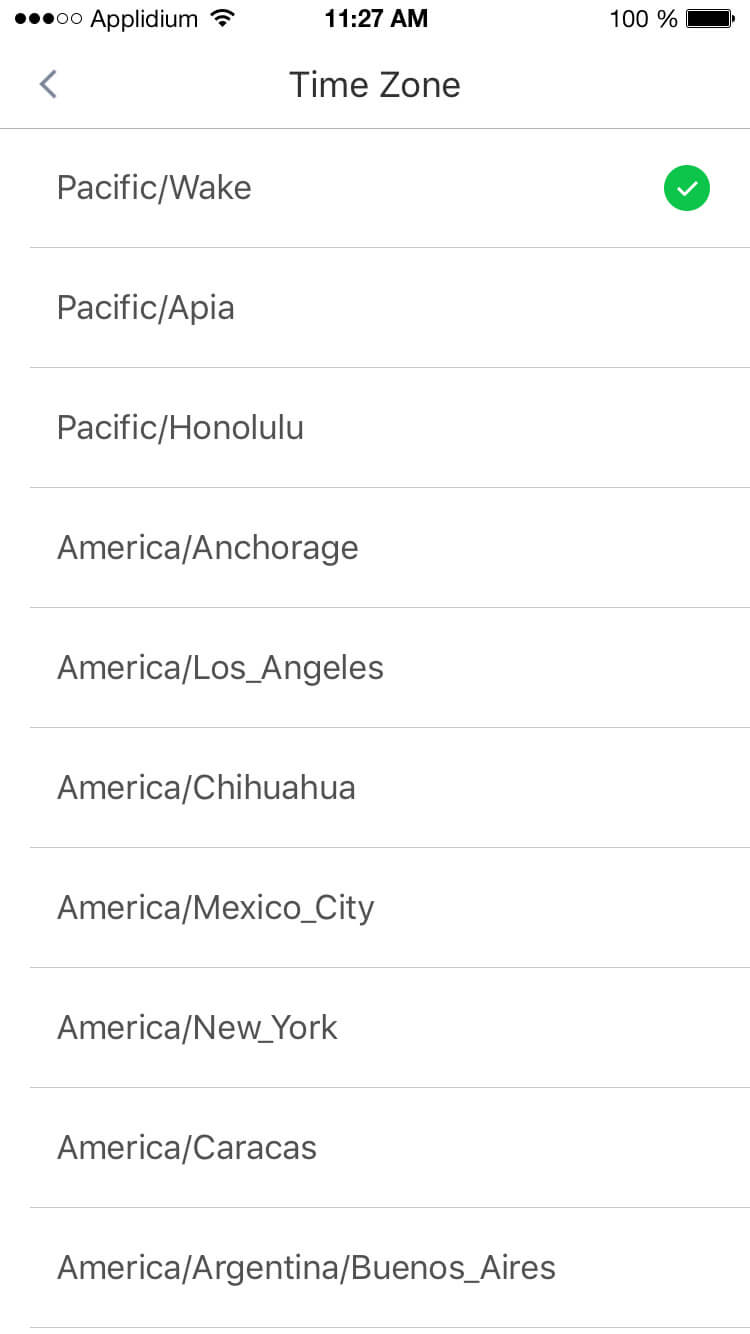
4.6.2 Time Zone
Click the icon on the right side to enter the “ Time Zone ” page and select the corresponding time zone , as below :
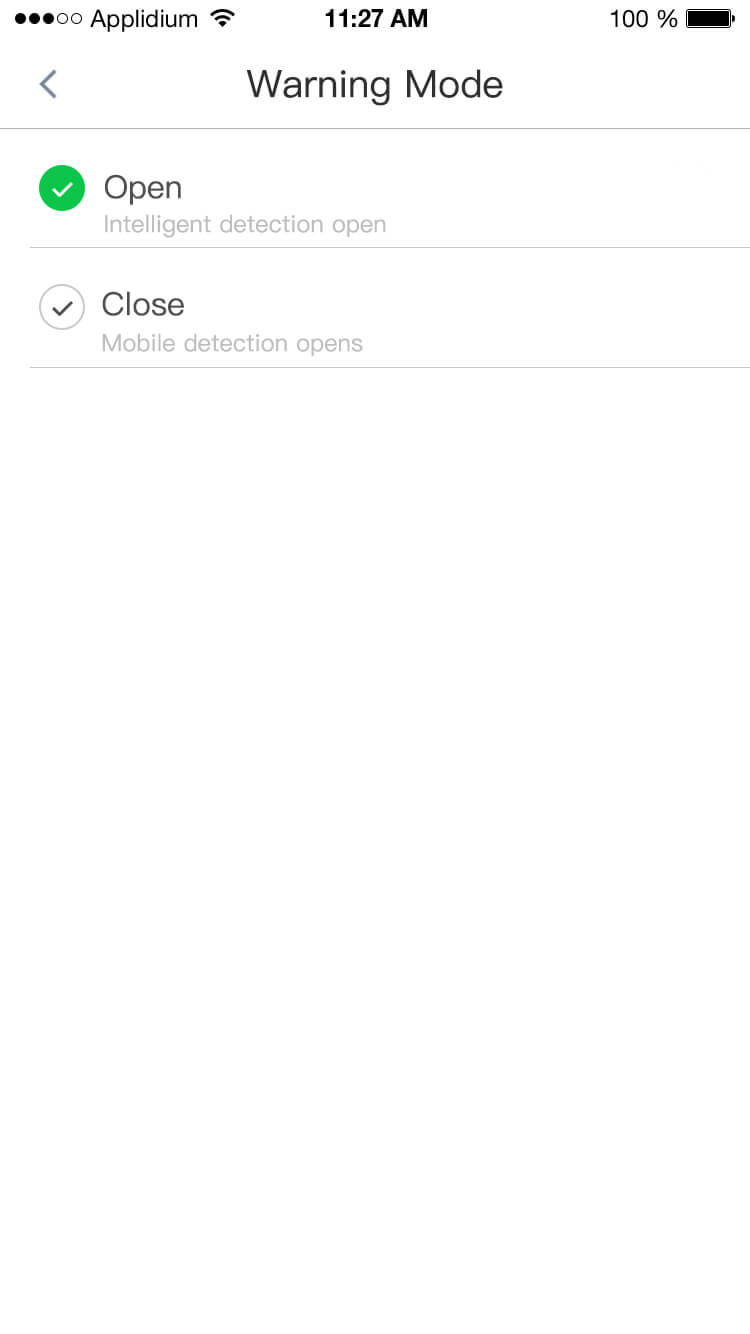
4.6.3 Message Push
Click on the icon on the right side and go to the“ Message Push ” page to choose “Enable” or “Disable”the alarm as below:
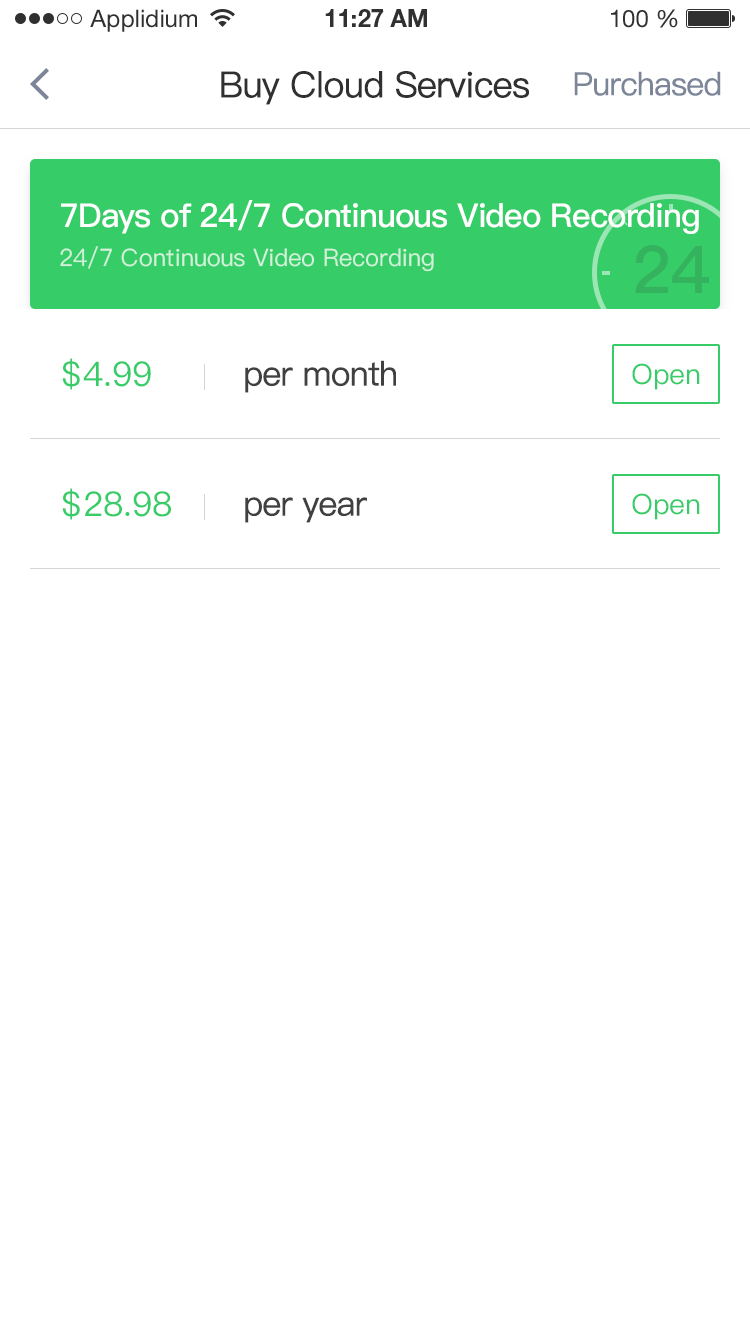
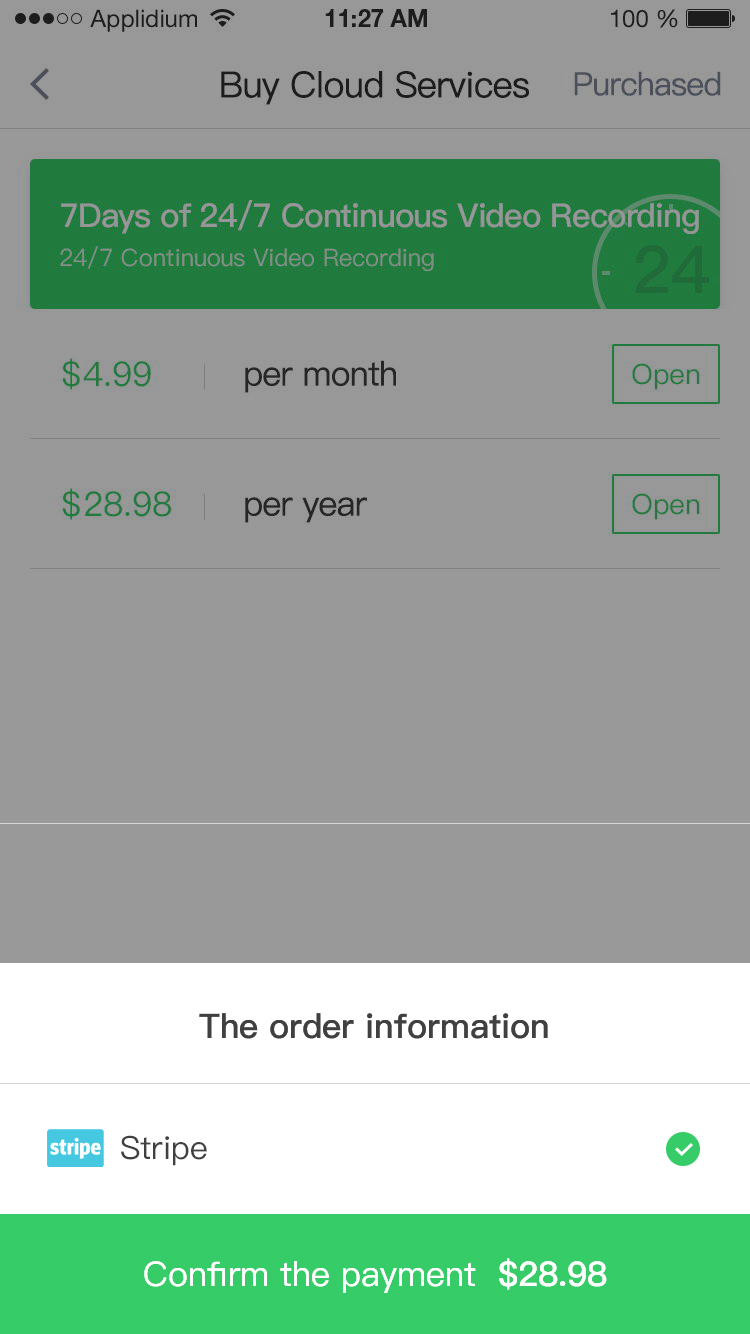
4.6.4 Cloud Storage Service
You could purchase either of the plan separately according to your requirement. Of course you must have a good experience if they are both on for your daily monitoring. Just to go settings and click on “cloud service”, select plan which is suitable for you!
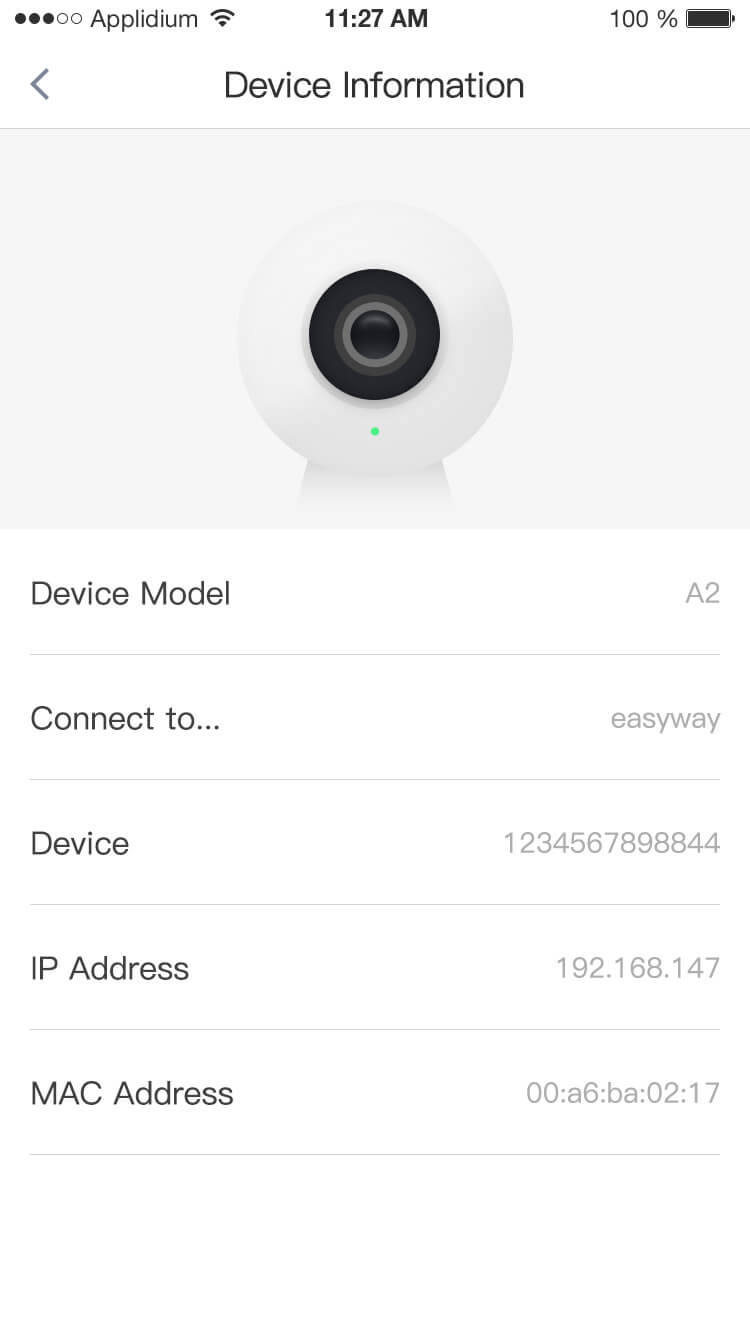
4.6.5 Device Information
Click the icon on the right side and go to “Device Information “page, as below:
4.6.6 Storage Card State
Here shows whether the camera has a Storage card.
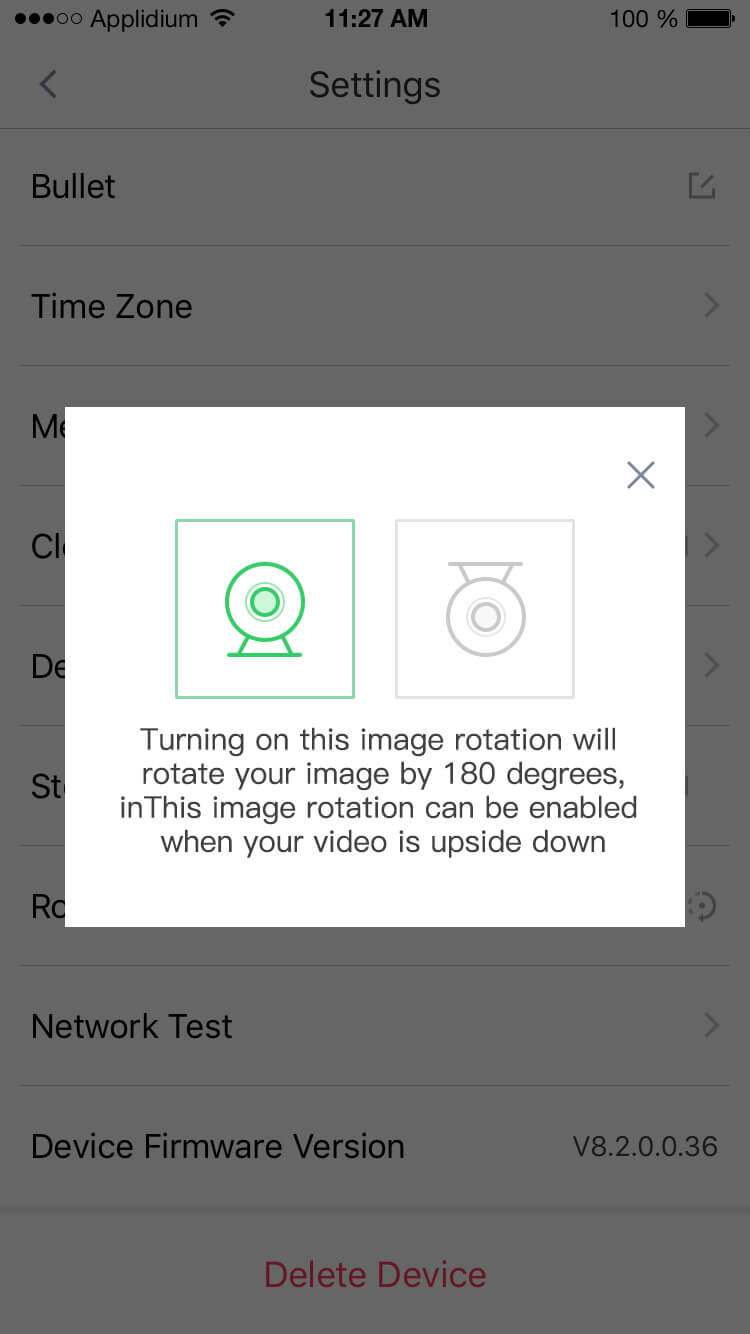
4.6.7 Rotate the Image
Click the icon on the right side to go to” Rotate the Image 180° ”page as below:
4.6.8 My Share
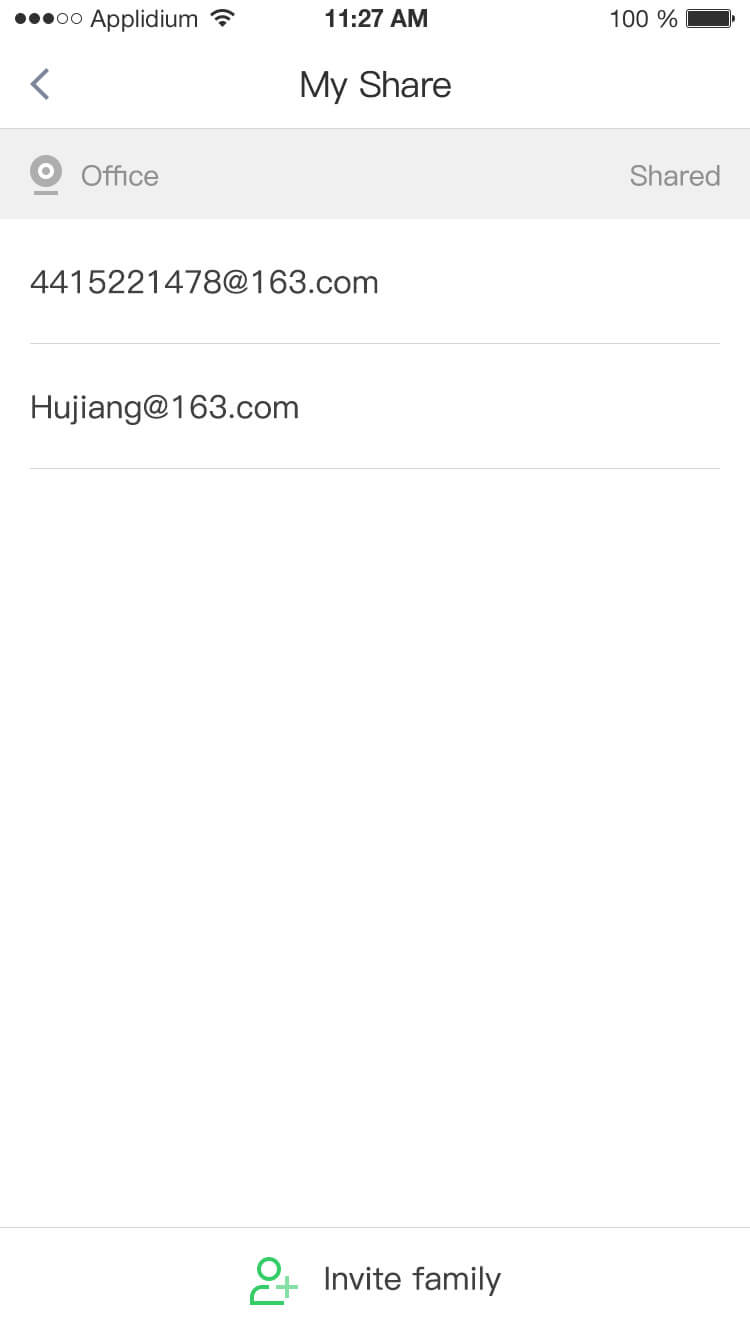
Click on the “Invite family “below to go to ”Add member”page,as below:
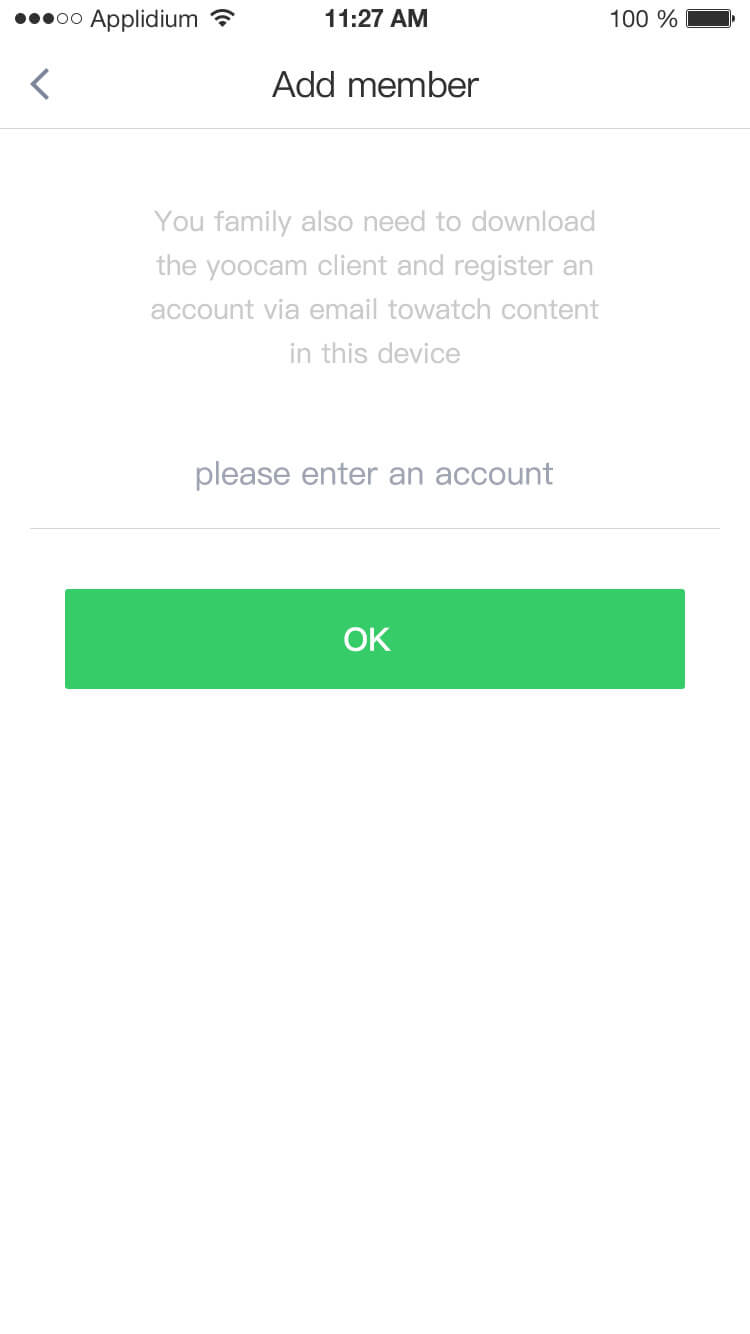
After the invitation is successful, when family members log in to their Smarwo account, a notification of device sharing will be received. Select YES, you can view live video of the device . (the invited needs to download Smarwo and register the Smarwo account)
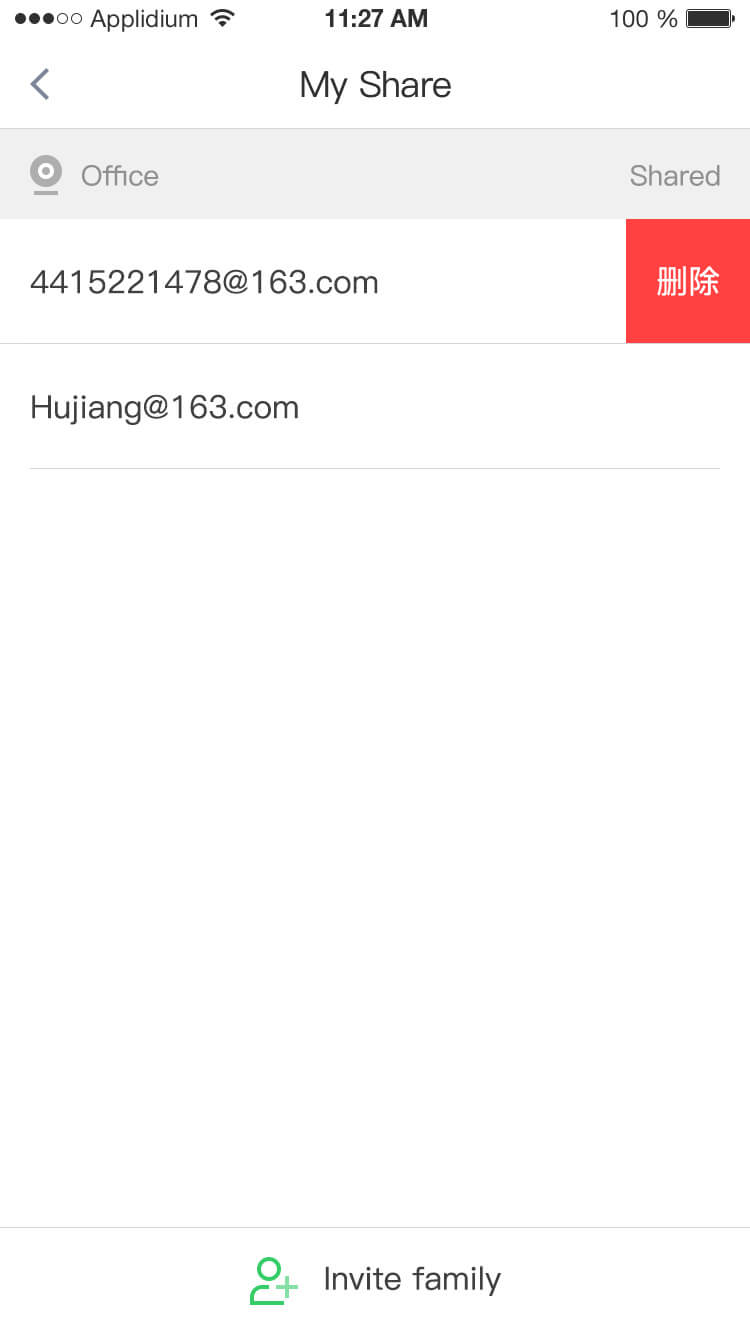
The inviter can delete the device manually in the device list. Inviting parties can also find the invited account in the page of "My share " and delete it.
4.6.9 Reset Wi-Fi
Click the right icon to go to the "Reset Wi-Fi" page as below. (reset the Wi-Fi operation and the device adding process are follow the prompt steps).
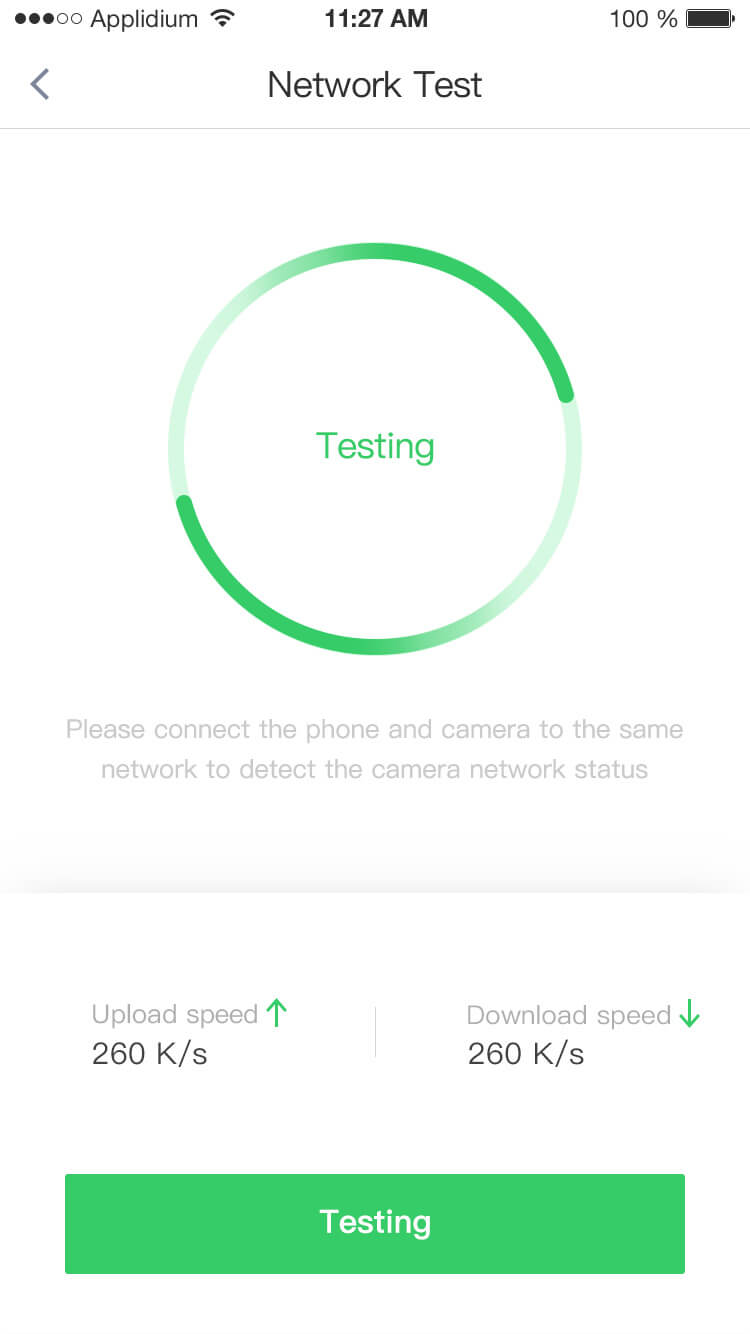
4.6.10 Network Test
Click the right icon to go to the “ Network Test ” page, click "Test Speed" to get the current upload speed, download speed; The test process may last for few seconds.
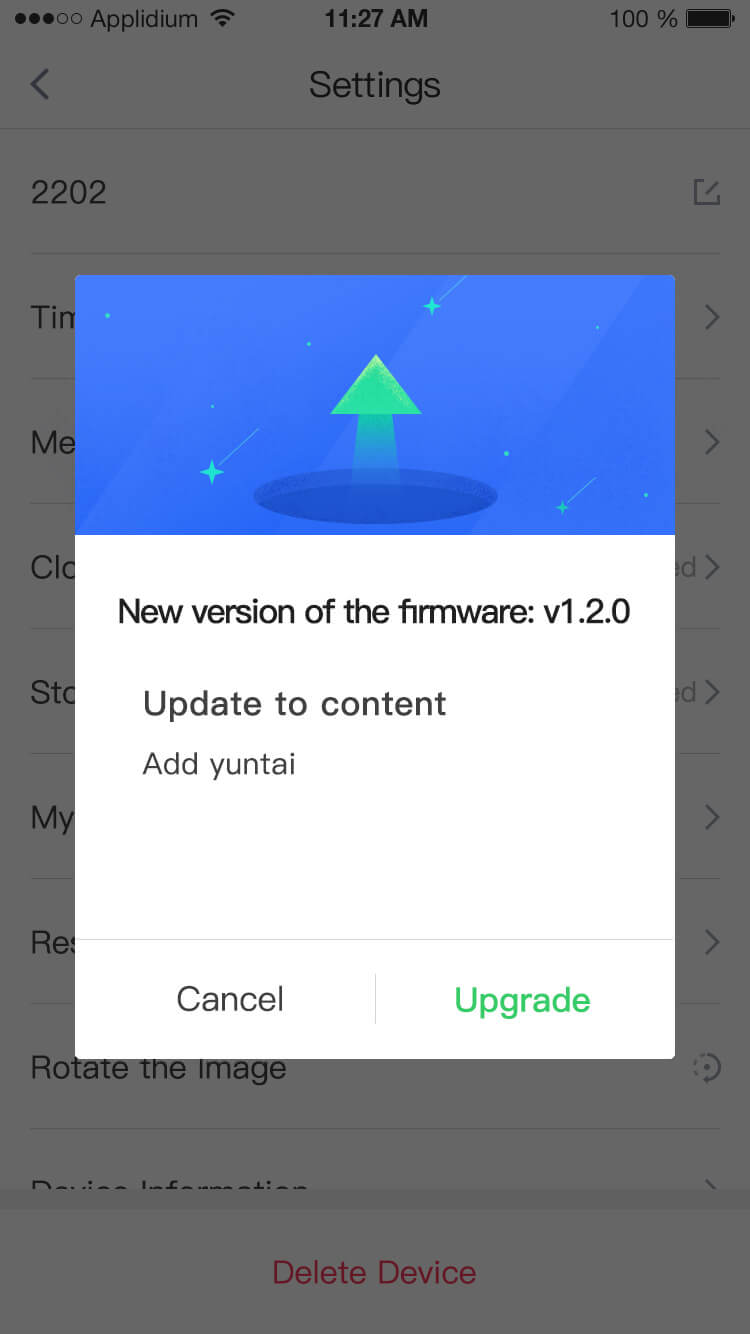
4.6.11 Device Firmware Version
When a new firmware version is available, a red logo will appear. Clicking the red logo for firmware updates.
4.6.12 Delete Device
Delete device need double confirmation. After the device has been successfully deleted, it can be added to other accounts.
5. System Setting
5.1 Change Account Password
【1】Click the menu button on top left corner of device list to enter the left menu . Settings - change the password to go to the "reset password" page;
【2】Enter original password, then enter the new reset password, and check new password is correct, click "Confirm", reset password successfully.
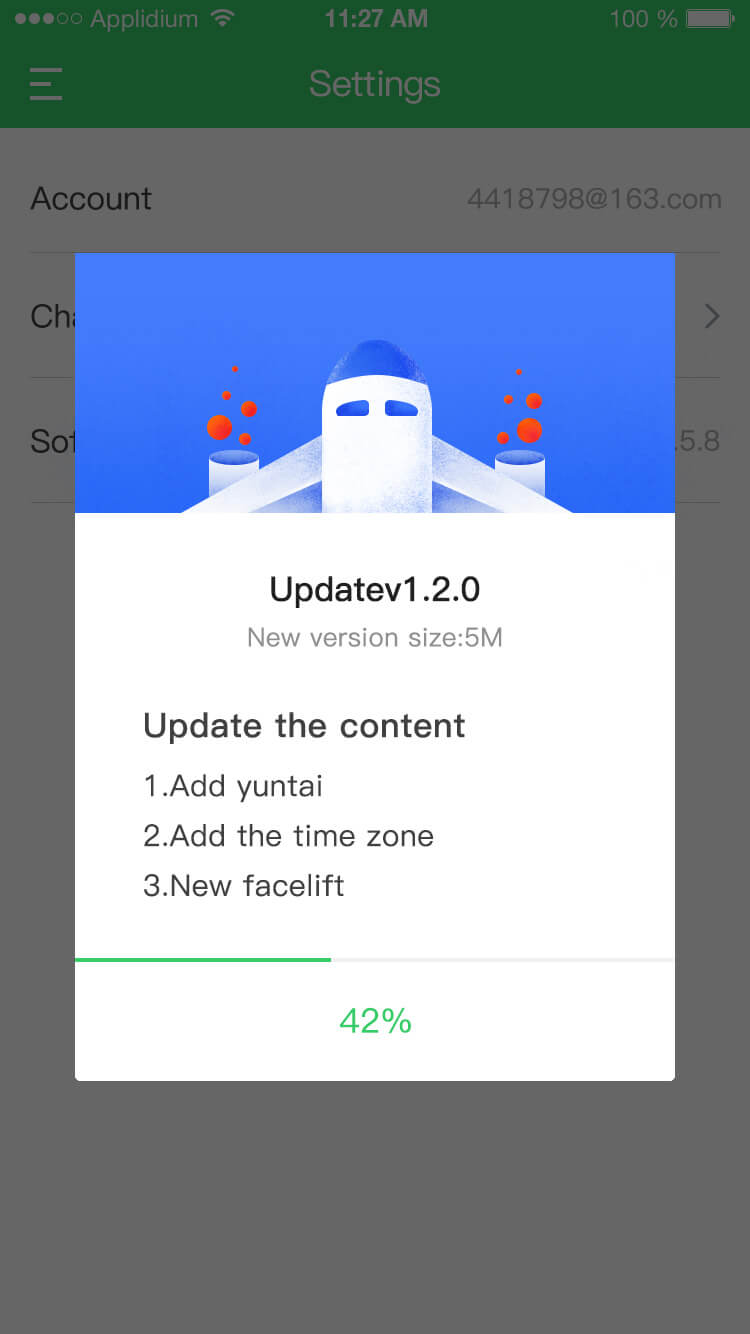
5.2 Software Version Upgrade
Click the menu button on top left corner of the device list to enter the left menu. Settings - software version to go to the "software upgrade" page;
Terms of Service
This agreement is a legal agreement between you (an individual or an institutional group) and Worthcloud company (Worthcloud Technology Co ., Ltd).Be sure to read and understand all the rights and limitations set out in this agreement.Once you install, copy, cut, access, or other ways to use this software product,indicating you are agree to accept all the terms of this agreement.If you do not accept the terms of this agreement, please do not install or use this software product.
1.Grant permission.This agreement grants you the following rights.
Installation and use of software.
You can install, use, access, display or run copies of any earlier version of this software product or the same operating system on your cell phone and other electronic devices that allow you to operate.
Users are required to get "hardware device" together so to use this software.
support services.
This software can provide you product related support services.Any supporting services provided for you are considered to be part of this software product and are subject to the terms and conditions of this agreement.
Software leasing.
It is not allowed to rent, lease or transfer the software products.
Software transfer.
Agree not permit, re-licensed or transfer.
No product transfer or product rights transfer to others before getting Worthcloud’s written authorization.
Termination.
If you fail to comply with terms and conditions of this agreement,on premise not to prejudice any other rights, Worthcloud company could terminate this agreement.In this case, you must destroy all copies of this software product and all its parts.
2.Copyright.
All copyrights of this software product belong to Worthcloud company,this software product include but not limited to image, photo, animation, audio,video, accompanying print.
All property rights and intellectual property rights in the use of this software product belong to the corresponding owner,and shall be protected by corresponding copyright or other intellectual property laws and treaties.
This agreement does not grant you the right to use this content.
Reverse engineering, reverse compilation, and reverse assembly are prohibited.
Users are not allowed to reverse engineering, reverse compiling or reverse assembly this software products,and could not alter any resources compiled within the program files.
3.Disclaimer and limitation of liability
Users confirm to notice all software functions and worthcloud company’s necessary operation which to realize software functions.
Users have free choice to use this software and related service according to self-demand,and take fully responsibility of risks & consequences of using this software and related services,Worthcloud company is liability exemption.
This software is tested in detail, but it is not guaranteed to be fully compatible with all hardware and software systems. It is not guaranteed that this software is completely correct.
If there is an incompatibility and software error, the user can contact the company's customer service and get the technical support.
Users can delete the software if compatibility issues are not solved.
In the maximum extent permitted by applicable law,damage and risk caused by software or software not matched,including but not limited to direct or indirect personal injury and risk, commercial profit loss, trade terminal, business information loss or any economic loss,Worthcloud company is liability exemption.
When user violates this agreement,which cause Worthcloud company loss,Worthcloud has rights to take actions including but not limited to discontinue licenses use, stop providing services, and limit usage.
4. Other terms
If any provision of this agreement is wholly or partially invalidated or unenforceable caused by any reason,violate applicable law,then this clause was deemed to have been deleted.Other provisions of this agreement shall remain valid and binding.
Worthcloud company has rights to revise this agreement according to the changes of relevant laws and regulations, as well as the adjustment of the company's operating conditions and operating strategies.
When a dispute occurs,judgment criteria is latest agreement version.
Users can delete the software if do not agree to the modified content of the agreement.
If users continue to use the software, it is deemed to accept the change of this agreement.
Worthcloud company has rights of interpretation and modification of this agreement within the maximum scope permitted by law.
